
|
|
|
|
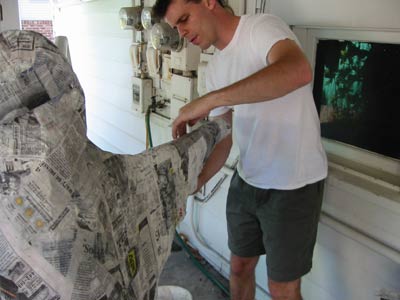
Use half-strips or smaller pieces in areas where long strips are ungainly, such as where the surface is made of sharp angles.
|
Do not start the crossword puzzle as while you are gluing the strips down. |
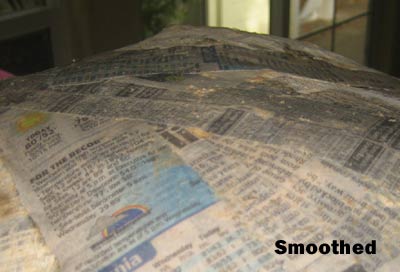
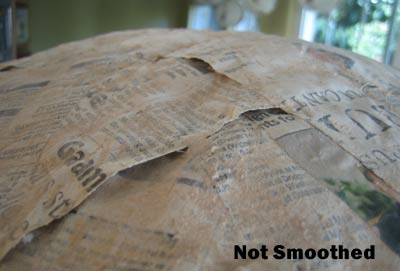
Be sure to smooth the strips down with your hands. This isn't as important in the beginning, but it is very important for the top (final) layer. |
|
The wet strips of newspaper should be smooth and they should conform to the shape of whatever they are covering, just like a wet T-shirt. The edges of each strip should be stuck down. If the paper is popping up off of the surface, try smearing an extra couple of tablespoons of paste onto that part of the paper. Beginners can find it surprising that the sculpture is turning out to look exactly like the armature. That it doesn't hide flaws. They also may find it difficult to "build up" places in the sculpture (such as constructing a nose or ear) with wet paper. Maybe I should have mentioned this earlier. |
|
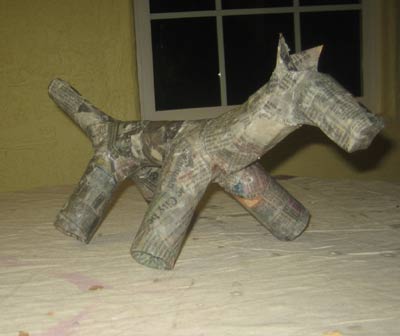
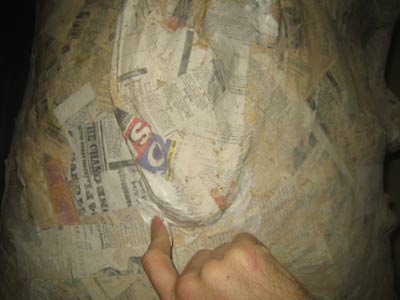
I find it very satisfying to apply the final strips. Check the entire surface for small holes between the strips, and try to keep the finished surface smooth. Larger projects need more than one session of paper-applying, because you won't want to work on the feet while the hat is still wet.
|
When you are finished applying paper, clean up. Store the unused paste covered in the refrigerator, or just throw it out and make fresh stuff tomorrow. Depending on the temperature and paper thickness, it will take between three and thirteen hours for the paper to dry. If your sculpture contains balloons, do not try to hasten the drying with direct sunlight or a heat gun. The heat can cause the balloons to expand, bursting out of their paper shells. Fans are OK. It is easy to see when the paper is dry. The color becomes much lighter. Behold! The paper mache sculpture is finished, ready to be finished with paint or crepe paper. |
Painting Every type of paint seems to work with paper mache. Latex house paint, craft paint, spray paint. The only problem I can imagine arising is if the paint is so sloppy wet that it softens the paper mache. One coat of paint is usually enough.
|
And that should do it! Now that you have read all of the above, you are more than ready to give it a try. Good luck, and don't forget to take photos while you are working, not just of the final result. To read more about the projects featured on this page, please read my other paper mache-related articles: Paper Mache Globe |
Cockeyed How to Guides :
Load the Dishwasher |
Get Rid of a Cooler of Rotten Meat |
Sew a New Shade Structure Canopy |
How to Return $100 Cash to its Owner |
Disneyland Shades |
How to Fix a Fog Machine |
Concrete Umbrella Base |
Patio Umbrella |
Restore Car Headlights |
Make Slushie Magic |
Facebook Gifts |
Tell Time on a Watch |
Change your Oil and Filter |
Win Costume Contests |
How a Toilet Works |
How to Fix the Pullcord on a Weed Eater |
How to Untwist a Seatbelt |
How to Get a Ticket to a Sold-Out Show |
How to Make a Sign |
How to Memorize the Geography of Africa |
How to Memorize the Geography of Canada |
How to Remove Shoes from Telephone Lines |
How Not to Build a Patio Cover |
How to Remove Slats From Blinds |
How to Remove a Toilet Ring |
Things I Figured Out, Part 3 |
Fence Ideas |
Easy, Illustrated Instructions on How to Fix a Fence |
How Fences Break |
How to Fix a Gate |
How to Keep your Video Card Cool |
How to Patch a Hole in the Wall |
How to Paint a Room |
how to make a mold out of silicone caulk |
how to have a halloween costume contest |
How to Siphon Liquids |
How to Unlock the Bathroom Door |
How to Repair the Lens Mechanism |
How to Reset a Circuit Breaker |
Using the Hell out of your Digital Camera |
How to Decorate your House with Christmas Lights |
How to paper mache |
What is the Learning Curve? |
How to change a flat tire |
how to make coffee |
How to change your brake pads |
How to Replace the Pull Cord on your Lawnmower or Leaf Blower Engine |
How to Cut and Paste |
How to make fire with two sticks |
Refilling an Ink Cartridge |
How to Fight a Speeding Ticket in court |
contact Rob
Science Club |
How much is inside? |
Home |
Incredible Stuff I Made | Pranks
| How to Guides
October 29, 2007
 Overlap paper strips at wild angles, covering every inch of the sculpture frame. It is difficult to keep track of which areas are thinly covered and which areas are thick, but I'm going to give you the following guidelines anyway: If the internal structure is a balloon, or other temporary structure, you will need to use about four layers of paper to create a self-supporting exo-skeleton when this paper dries. If you have a rigid armature, such as chicken wire or soda bottles, you only need two layers.
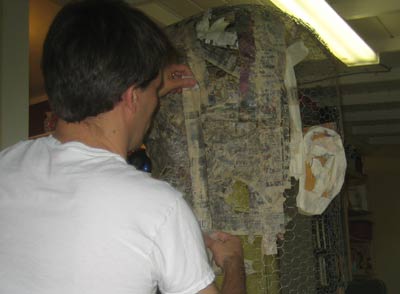

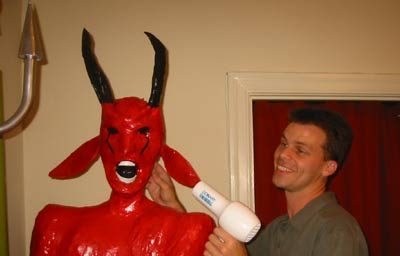 I'm no expert at painting, so I have almost always chosen color schemes which are plain and cartoonish.