| Fence Ideas - How to Fix a Fence - How Fences Break - How to Fix a Gate |
Because they have moving parts, gates are likely to need repair or replacement before the fence itself.
The strength of a gate is 80% dependent on the stability of the post which supports the hinges. The gate will probably weigh 70 lbs. when you are finished, and its center of gravity might be two feet from the post itself, so you've got to start with a solid post or you are doomed to failure.
|
If you are building a new gate from scratch, choose a width according to your needs. A wide fence is harder to engineer because of the additional weight, but you should at least give yourself a gate wide enough to maneuver a wheelbarrow through. Also, the jumbo 4-foot dollys that those jump-house delivery guys use.
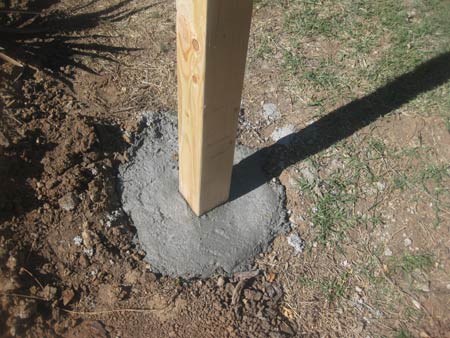
If you are dealing with a broken gate, there is a good chance the post has failed. If this is the case, I recommend pulling out the old post and inspecting the cement hole. If
the cement footing looks solid
you can pull out the old wood and dirt fragments
the hole is at least 18" deep
you can re-use it.
Or, you can dig a hole and mix a bag of concrete to erect a new post. I recommend using pressure-treated lumber, probably a 4x4.
For easy, illustrated instructions on how to cement in a fence post, please jump to that part of How to Fix a Wooden Fence. |
Usually a gate spans the distance between two posts. The one which will bear the hinges, and another one, where the lock or latch will be. The latch post doesn't need to be as strong or sturdy, but if you are concreting in one post, you might as well do both.
Buy some gate hinges. Home depot sells a wide variety of hinges as well as a few shrink-wrapped sets of gate hardware, including hinges and latch. You should be looking for hinges which are about seven inches long, not small hinges nor the largest. Even if you don't buy the pre-packaged kit, pay attention to what size hinges are included in those. They are probably correct.
If you need a gate which is wider than six feet, perhaps for a boat trailer, plan a double-door gate with hinges on both sides.
Another gate design (not for the boat gate) is a Dutch door gate split into a top and a bottom.
With two posts in place, experiment with the hinges and latch to make sure they will operate in the manner you are anticipating. If you surface-mount the hinges, the latch will need to be on the same side, which should almost always be inside the gated area. I prefer the hinges to be on the inside so that the gate is somewhat hidden from the street view.
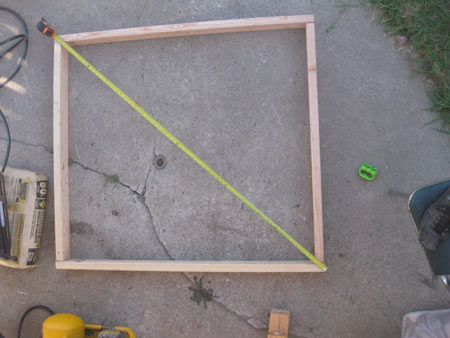
To build the gate, measure the gap and plan a gate door which is 1" less than that space. It may be tempting to build it with smaller tolerances, but gates always sag over time, and it is preferable to have a gate with a slight gap than one which scrapes by each time it opens. In any case a gap in the gate frame can be hidden by placement of the pickets. Ideally the top and bottom of the gate will be the same width, but measure it and build a gate to fit the actual space. In my experience the gate is always a little wider on the top or the bottom.
For the top and bottom rails, mimic the height of the attached fence rails. If you don't have any fence rails to copy, use 15" and 60". The difference between these numbers, in this example 45", is the proper height of your fence frame square.
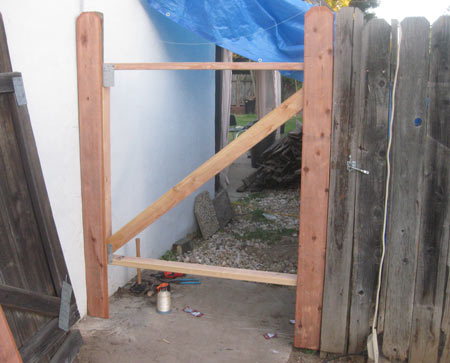
Cut redwood or pressure treated 2x4s and assemble a rectangle for the gate frame. You can check if the gate is square by comparing the diagonal distance between the corners. They should be equal. Note that the 2x4s are assembled so that the frame is 3 and a half inches deep. This is to match the construction of the rest of the fence.
|
|
|
Assemble Frame
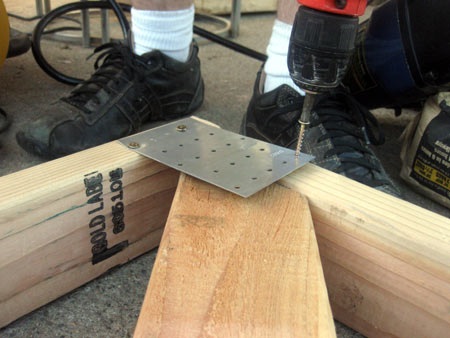
Put the frame together with 3" screws or nails.
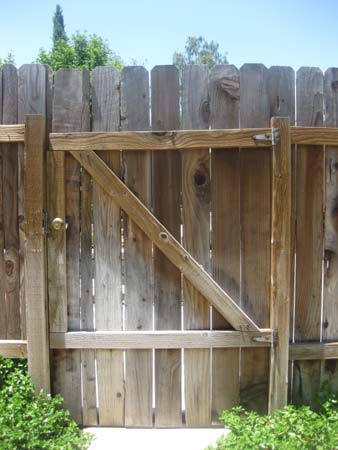
Lay another 2x4 diagonally under the new frame. It should be arranged so that it will span the gap from the lower hinge up to the latch-side top. Not from the top hinge down to the latch-side bottom. The hinge side is the well supported end of the gate. Imagine this diagonal brace to be popping up from the hinge post like the branch of a tree. Either orientation will work, but I recommend laying the diagonal brace flat against where the fence pickets will be. This should help stop kids from climbing on the gate.
Mark and cut the diagonal brace and screw it into place.
Use rectangles of perforated steel plate, known as tie plates to provide extra strength to the corner connections.
http://www.strongtie.com/products/categories/angles_diy.html
You can add a cable running across the other diagonal now or after the gate has been working for a while. Include a turnbuckle so that it will be easy to adjust (tighten) as the fence sags down at the latch end. |
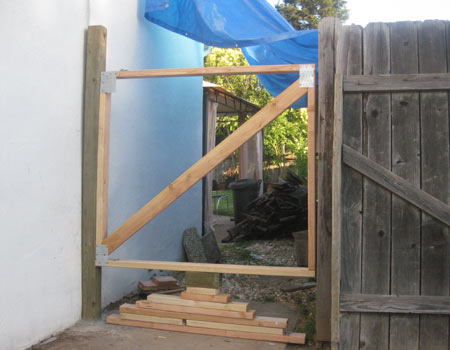
Block into Place
Once the frame is screwed or nailed together solidly, use blocks of wood to lift it into position for the attachment of the hinges.
|
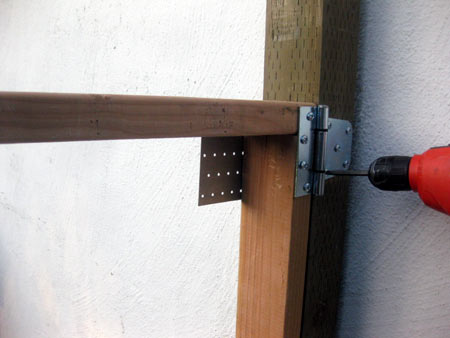
Attach Hinges
Place the hnges so that they will have at least one screw into the top and bottom rail.
Mark where the hinges and screws should go. Make sure the hinge pins are aligned straight up and down.
The hinge screws are important screws. They have to survive many years of constant force. Pre-drill narrow pilot holes for the screws. This will leave enough wood for the threads to grab onto, but keep the screws from splitting the grain of the wood.
Now that I think about it, this is one of the only times you have to drill pilot holes on an outdoor woodworking project.
With the hinges attached, remove the wooden blocks from the bottom and try out the swinging action. (The latch isn't installed yet. Be careful that the gate doesn't swing past where it will shut and tear the screws out.)
|
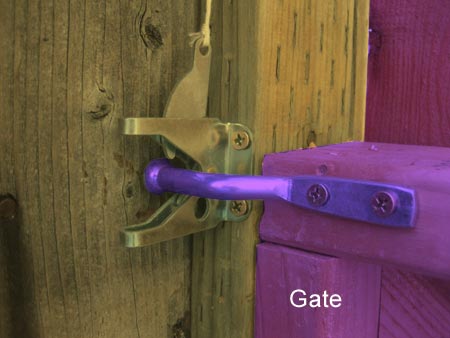
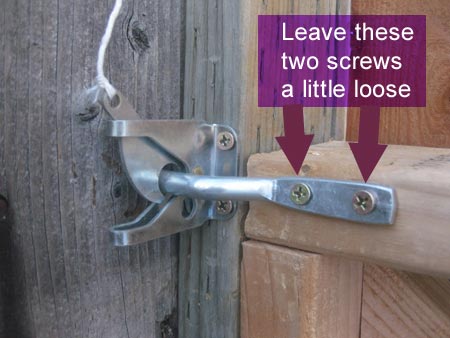
How to Install a Gate Latch
Install the gate latch. On most doors, the latch is at a mid-height, but you can move it up if you want to keep it out of reach from children or down if you want to keep it out of reach from outside visitors. In California, everyone in a non-terrible neighborhood runs a string from the latch to the outside.
|
The last step before starting the fence pickets is to cut off the extra height of the fence posts. I don't see an advantage to leaving the posts higher than the fence, but you can judge for yourself on the "Fifty Good and Bad Fence Ideas" at the end of "how to fix a wooden fence" article.
Now add 50 lbs. of fence pickets.
|
Add Pickets
The gate will probably only need 7-10 pickets, but don't just tack them into place. They need to:
- Line up with the height of the fence pickets
- Be even across the top
- Be high enough off the ground that they don't scrape the ground when the gate opens, and
- Fill the width of the gate with no odd spacing left over between pickets.
Do not attempt to butt the fence pickets against one another without leaving space between them for a little expansion from moisture. If you do, the pickets will expand and pop loose ruining the gate. Leave at least the width of a nail between pickets (1/16th inch).
Start with outside pickets and stretch a string between their tops to give yourself a line to bring the pickets up to.
|
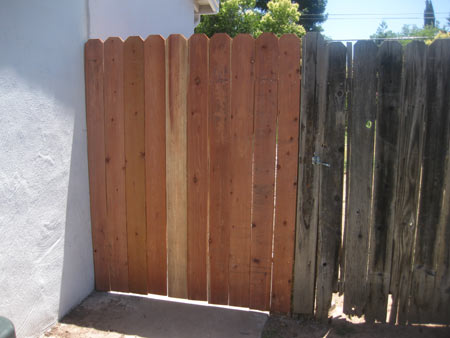
The dog-eared tops help to conceal tiny height differences, so you can probably just eyeball the top to make sure it is even.
I recommend starting with a single screw to temporarily pin boards to the frame and check if their bottoms scrape as the gate swings open. Saw off an inch or so if the boards scrape, reattaching and re-checking as you go. Judge for yourself if it is better to have the gate pickets two full inches above the ground than to have the gate start to scrape after one month of settling. |
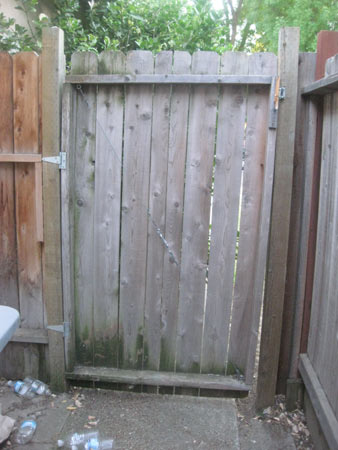
Here's a sample photo of simple gate with a support cable and turnbuckle but no diagonal brace. |
|
|
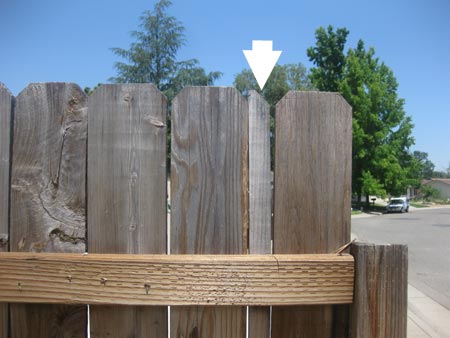
As you fill in the gate with pickets, you will likely be left with an odd space requiring the modification of at least one picket.
|
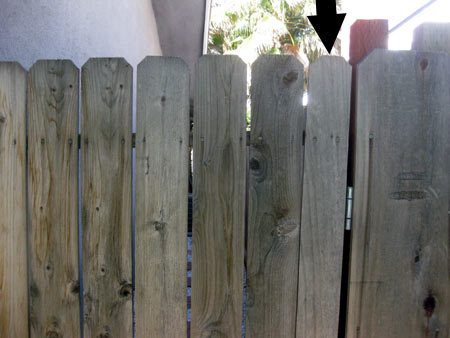
If the space is 4 or more inches wide, rip a fence picket to the correct width. Cut a new notch at the top to match the dog ears on the other boards. This thin picket will be least visible at the center of the gate.
|
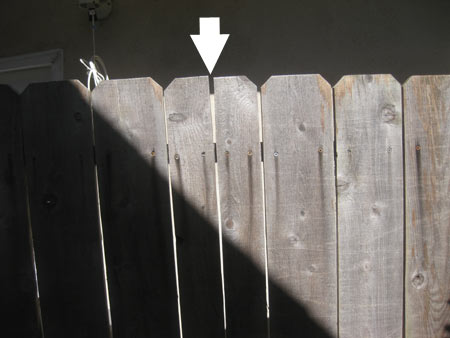
For a gap of less than four inches, I recommend ripping a little off of two pickets. Don't dog ear them.
For very small gaps, slice a picket in half and add a gap between the two parts.
Despite taking twice as much effort as the fence itself, making a new gate that opens and shuts cleanly is a very satisfying experience. I highly recommend it.
|