
|
|
|
 This
episode is written halfway like a how-to. I hope you don't
mind. People ask me about paper mache all the time, so I've included
some of my sage advice. This
episode is written halfway like a how-to. I hope you don't
mind. People ask me about paper mache all the time, so I've included
some of my sage advice.
In February of 2001, my old friend James from work asked me about making some artwork for a music festival that his wife helps put together. When we got on the phone, Sherry told me that one of the festival organizers had an affinity for hummingbirds, and negotiated a deal for me to make a big paper mache hummingbird for their Sierra Nevada World Music festival in June. |
|
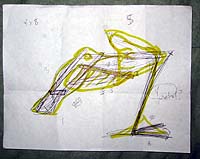
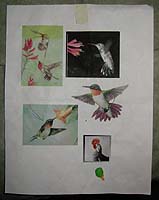
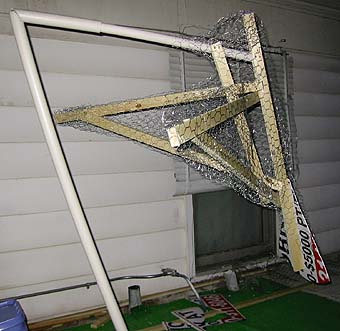
 After studying some photos of hummingbirds online, I drew one with how I
could create a skeleton frame out of 1x2 wooden planks. I figured on a 6'
wingspan.
After studying some photos of hummingbirds online, I drew one with how I
could create a skeleton frame out of 1x2 wooden planks. I figured on a 6'
wingspan.
I love using a little drawing like this, adding up the lengths of the pieces I will need, and heading directly to Home Depot. I used 3 8' 1x2s. I wanted the hummingbird to look free-floating, so I made a stand that would later become a flower.
|
|
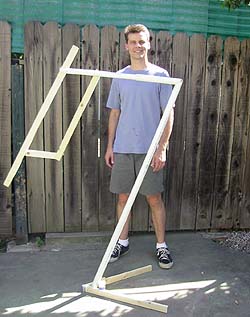
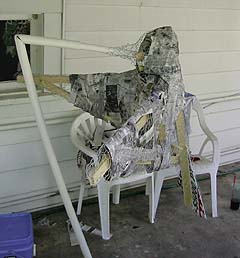
 Using PVC pipe, the hummingbird's beak would slide into the flower's
style, making it a little easier to handle & disassemble.
Additionally, with the work suspended, I wouldn't have to move the wet
mess around too much.
Using PVC pipe, the hummingbird's beak would slide into the flower's
style, making it a little easier to handle & disassemble.
Additionally, with the work suspended, I wouldn't have to move the wet
mess around too much.
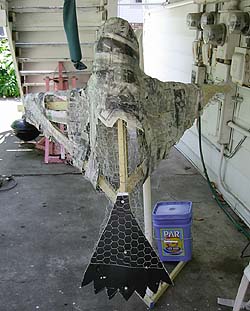
Here the pieces for the wings are attached. The stand was not heavy enough to support the weight, so note the blue bucket of Par laundry soap holding it in place. |
|
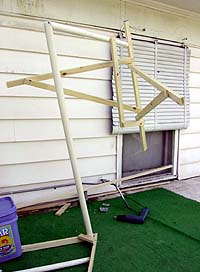
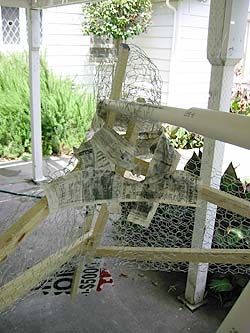
 I stapled chicken wire onto the frame. The wire is strong enough to
support gentle curves pretty well, but you cannot get too detailed.
I try to bend all the pokey bits back inside, so I don't gouge myself
throughout the papering process.
I stapled chicken wire onto the frame. The wire is strong enough to
support gentle curves pretty well, but you cannot get too detailed.
I try to bend all the pokey bits back inside, so I don't gouge myself
throughout the papering process.
At the tail, I cut up a coroplast sign and stapled that on. Coroplast is corrugated plastic. It is what those lame "make $30,000 from your home in your free time" signs that you see nailed onto telephone poles all over are made of. This stuff is great material & I encourage everyone to tear some down today! |
|
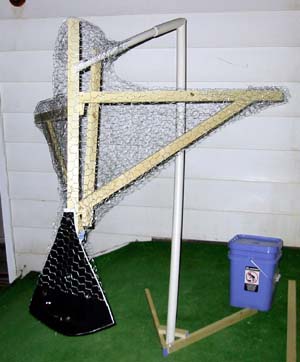 You
can just make out how the two pipes meet at the end of the beak
here. That PVC in the flower stem is cut and bent over at the top. I
heated it up over the stove for that, because I was too cheap to buy the
$1 plastic elbow. You
can just make out how the two pipes meet at the end of the beak
here. That PVC in the flower stem is cut and bent over at the top. I
heated it up over the stove for that, because I was too cheap to buy the
$1 plastic elbow. |
|
 With the wireframe done, I tore some newspaper into 2-3 inch strips.
newspaper rips nicely in one direction, horribly in the other.
With the wireframe done, I tore some newspaper into 2-3 inch strips.
newspaper rips nicely in one direction, horribly in the other.I encourage you to discard any strips that are too thin (under an inch) or too wide (over 3 inches) right away. Throw out the folded ones from the middle too. Newspaper is cheap enough to just use the perfect ones. |
|
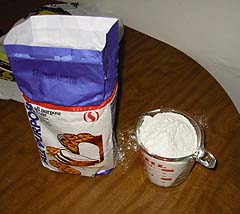 Paper
Mache Paste
Recipe Paper
Mache Paste
Recipe
I use three cups of flour in four cups of warm water. I don't know if the temperature makes a difference, but the warm water makes it much nicer to work with. Of course, you should pee first. |
|
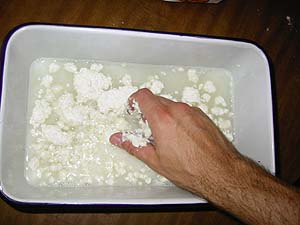 Put the water in first, then sprinkle the flour in a bit at a time,
smooshing it with your hand until it is smooth. Any little chunks, even
ones as small as a pea are going to make yucky dry lumps on your finished
work, so make it smooth.
Put the water in first, then sprinkle the flour in a bit at a time,
smooshing it with your hand until it is smooth. Any little chunks, even
ones as small as a pea are going to make yucky dry lumps on your finished
work, so make it smooth. |
|
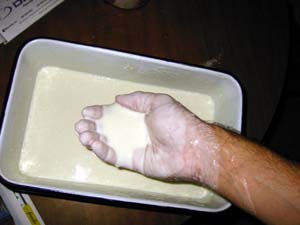 This takes about 20 minutes, especially if you are keeping one hand free
to operate your camera.
This takes about 20 minutes, especially if you are keeping one hand free
to operate your camera. |
|
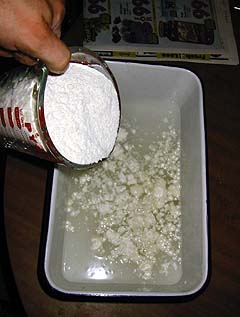 This
photo illustrates "sprinkling". This
photo illustrates "sprinkling".
I used to add white glue to this mixture, I don't anymore because I don't know what good it was. You could add some anti-mold chemical at this stage too, but I don't...hell, you could add cocoa mix at this point too. |
|
 The
first few strips of paper mache are hard to get on the object because the
wet paper only wants to stick to itself and not to the coated wire. You
sometimes have to be satisfied letting it hang there until you get a few
base strips on. The
first few strips of paper mache are hard to get on the object because the
wet paper only wants to stick to itself and not to the coated wire. You
sometimes have to be satisfied letting it hang there until you get a few
base strips on.
|
|
 It
was about 100 degrees on the days I was doing this, which wasn't too bad.
It was really dry & I was in the shade with a huge icy drink. It
was about 100 degrees on the days I was doing this, which wasn't too bad.
It was really dry & I was in the shade with a huge icy drink. |
|
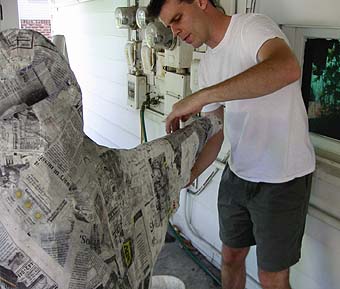
 Mike
got some great shots of me in action. Mike
got some great shots of me in action.
I keep the top of the newspaper strip dry so that it won't rip while I lightly squeegee off most of the paste. If it gets folded or wadded up, just throw it aside, don't bother trying to smooth it out on your frame, it isn't worth the wet trouble. I cannot overestimate how important it is to get everything at a comfortable working level before you get your hands all wet and gluey. Also, get one big glob of paste onto your nice pants before you change into your work clothes. |
|
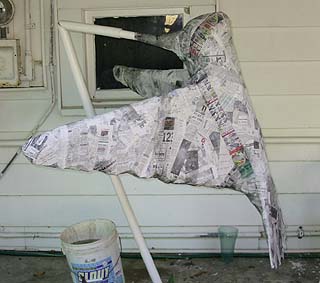
 I
think this was about 30 minutes worth of papering. You should aim for
getting two coats of paper over the whole thing if you are using a wire
frame, or 4 layers if you are using balloons (because the paper will have
to support itself when the balloons are deflated). I
think this was about 30 minutes worth of papering. You should aim for
getting two coats of paper over the whole thing if you are using a wire
frame, or 4 layers if you are using balloons (because the paper will have
to support itself when the balloons are deflated).
What really happens is that you concentrate on covering the holes, and the double-layering kind of takes care of itself. |
|
 My
fingers get all raisiny after an hour of this, so I usually take a break. My
fingers get all raisiny after an hour of this, so I usually take a break. |
|
 Wire frame
paper mache dries a lot faster than balloon paper mache because the air
can flow around the other side of the paper. Balloons are also
tricky because air inside them will expand & rip your paper if you
work in the direct sun. I've had two projects ruined like that. Wire frame
paper mache dries a lot faster than balloon paper mache because the air
can flow around the other side of the paper. Balloons are also
tricky because air inside them will expand & rip your paper if you
work in the direct sun. I've had two projects ruined like that.
Of course, chicken wire will poke your eyes out if you aren't careful, so there are tradeoffs. Please continue reading part two. |
|
other incredible stuff | home
Contact Rob July 12, 2001.