
|
|
|
|
Introduction
The flour and water get stirred together to make cheap, thin glue. The newspaper strips are dunked in this glue and draped over some form, creating a skin. When this skin dries, it maintains its shape. Shazam! No chisels, no kiln, and no fumes. Unfortunately, the lifespan of paper mache is short. The paper skin is flammable, susceptible to moisture damage and attractive to insects. You should not let this discourage you. I've found that the temporary nature of paper mache projects encourages fun and experimentation, two pillars of studio art.
|
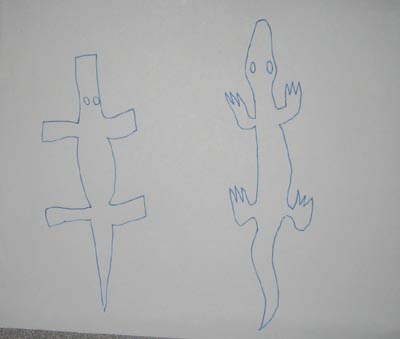
Get Started! You should try to draw it first. Here it is: For other people, this is when they should expand upon their project idea, to get a clearer idea of how their project is going to look when it is completed. One way to do this is to draw it. Another way is to print up a few images from the internet. I suspect that some people reading this might protest having to draw their project first, but I still encourage it. By attempting to draw it, you will face and solve a bunch of little design challenges before you get your hands dirty. For example, if you have the idea to make a paper mache alligator, and you don't draw it out first, you will probably start building a long body shape, and attach legs after that is finished. For example, the legs might end up poking out perpendicular to the body, because the design will be made up as you go. |
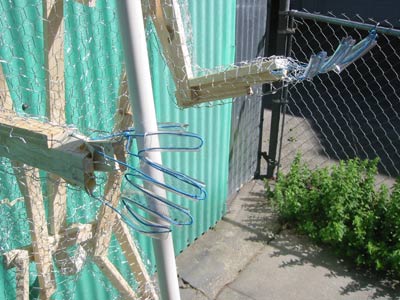
Prepare Armature Balloons The downside is that balloons tend to deflate in one or two days, so any projects built with them need to be completed and dried in that time. Quick-drying techniques can also backfire with balloons, because they can expand, busting through the new paper skin. I've also used a couple cousins of the balloon to build an armature: Inflated plastic packing pillows and bubblewrap. |
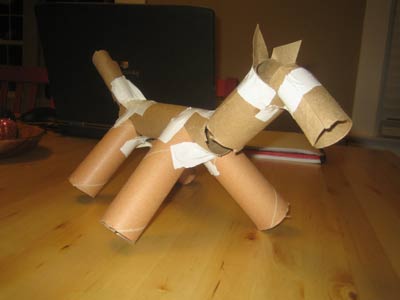
Other heavy paper is well-suited for building an armature, such as cardboard tubes from wrapping paper rolls and Fed-Ex shipping tubes.
|
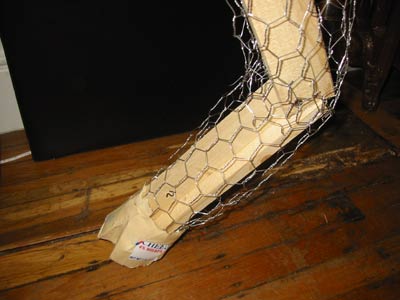
You will probably find that gloves will be more trouble than they are worth, because your fingers have to dance through the holes as you work.
|
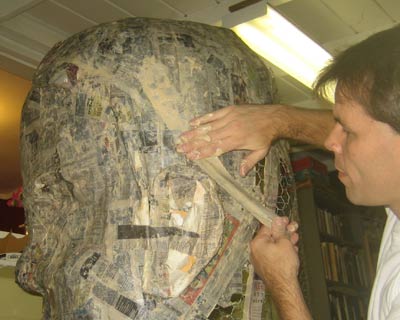
Past the size of a laundry basket, a chicken wire structure is too flimsy to support the weight of wet newspaper. Therefore any large sculptures will need a skeleton underneath. I recommend using 1x2 lumber and wood screws. 1. the skeleton for your sculpture will need to be very close to the surface of the skin. People, plants and animals look more natural if they aren't made up of 90 degree angles. It isn't as easy to screw them together at odd angles, but they will look a lot better in the final result. Two-liter soda bottles, fed-ex shipping tubes, the plastic from sour cream tubs and crumpled aluminum foil are also good choices for building cheap armatures. |
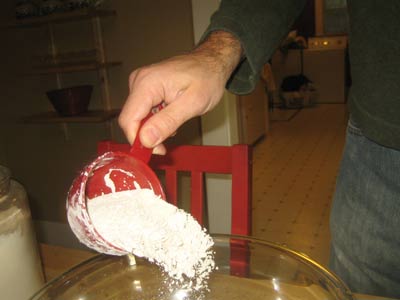
Make paste
|
|
Please continue reading page 2 of Easy, Illustrated Instructions on How to papermache. |
Cockeyed How to Guides :
Load the Dishwasher |
Get Rid of a Cooler of Rotten Meat |
Sew a New Shade Structure Canopy |
How to Return $100 Cash to its Owner |
Disneyland Shades |
How to Fix a Fog Machine |
Concrete Umbrella Base |
Patio Umbrella |
Restore Car Headlights |
Make Slushie Magic |
Facebook Gifts |
Tell Time on a Watch |
Change your Oil and Filter |
Win Costume Contests |
How a Toilet Works |
How to Fix the Pullcord on a Weed Eater |
How to Untwist a Seatbelt |
How to Get a Ticket to a Sold-Out Show |
How to Make a Sign |
How to Memorize the Geography of Africa |
How to Memorize the Geography of Canada |
How to Remove Shoes from Telephone Lines |
How Not to Build a Patio Cover |
How to Remove Slats From Blinds |
How to Remove a Toilet Ring |
Things I Figured Out, Part 3 |
Fence Ideas |
Easy, Illustrated Instructions on How to Fix a Fence |
How Fences Break |
How to Fix a Gate |
How to Keep your Video Card Cool |
How to Patch a Hole in the Wall |
How to Paint a Room |
how to make a mold out of silicone caulk |
how to have a halloween costume contest |
How to Siphon Liquids |
How to Unlock the Bathroom Door |
How to Repair the Lens Mechanism |
How to Reset a Circuit Breaker |
Using the Hell out of your Digital Camera |
How to Decorate your House with Christmas Lights |
How to paper mache |
What is the Learning Curve? |
How to change a flat tire |
how to make coffee |
How to change your brake pads |
How to Replace the Pull Cord on your Lawnmower or Leaf Blower Engine |
How to Cut and Paste |
How to make fire with two sticks |
Refilling an Ink Cartridge |
How to Fight a Speeding Ticket in court |
contact Rob |
Science Club |
How much is inside? |
Home |
Incredible Stuff I Made | Pranks
| How to Guides
October 29, 2007
 hicken wire