2008 Cockeyed.com Halloween Costume Contest

page 1 2 3


I’ve been wanting to Jambi for quite a while, but never really had the time to put it together until now.
Working at a design firm, I have access to plenty of leftover Gatorboard (gator foam). This was taken from a couple of presentation boards and hot glued together with jet melt, industrial-grade hot glue. The orange just happens to be part of a graphic from a previously mounted display board, but did have a nice effect.
Here’s after the first coat of metallic paint. It’s a water-based, washable paint, but was the closest I could effect-wise, so I knew I would need to seal it when finished. This first coat was laid over a coat of white primer. To reinforce the 90 degree angle on the doors, I superglued some acrylic at the joint. The doors are attached with super glue and run of the mill hinges, but I used binding screws (for paper) to give it a more finished look. The gator board is slightly porous, so even though I did the primer coat, it took about 5 *thick* coats to get it right.


Next I used a mixed bag of buttons from Michael’s by cutting off the mounts in the back that are intended for thread and hot gluing them flush to the doors. It took a while, but the effect was well worth it.
Next I needed to make a way to mount it to my shoulders. In addition to going to a couple of parties, I would also need to bartend later on that night, so the mounts had to be secure. I simply cut some gator foarm to go over my shoulders and added some padding at the pressure points, then left a channel to add some old laptop bag shoulder straps. The straps would actually go through holes cut in the top of my shirt and clip in to my belt loops to provide forward and backward support. It was a lucky first try, but it worked.
Finally came the liner. I bought some satin-ish fabric from a local store, but had to first drill in the mount for the light.


I bought a simple 8-light LED light that’s intended to be positioned in the top of a tent, but it came with a metal mount and a magnet back that made it work out perfect. I painted the lens with green acrylic paint to get it to glow the proper color, mounted the metal bar and began to lay fabric over top. An additional perk of this light is that it came with a remote control so I could turn the light on and off as I pleased.


My first test run. The glow worked out much better than I had anticipated.


Now it was time for make-up and we were ready to go. The costume worked out great and I got a lot of good feedback. I had thought about mounting the doors on actuators, which would have worked out great for my time behind the bar, but instead decided to let them open and close as they pleased. I think the actuators would have made a huge impact, maybe even a little smoke. Can’t wait till next year!

Total cost was about $45 for supplies (price does not include cocktails).
-James
http://www.twitter.com/InsoOutso

Hi Rob,
Just wanted to say thanks for being an inspiration. I never would have attempted anything like this before reading about all your adventures.
http://dmcme.blogspot.com/2008/11/halloween-costume-contest.html

And attached are a few pics of me making it.

The body is made from a sono tube for concrete foundations.
The feet are made from upside down salad bowls from the dollar store. I glued some old shoes inside.
The head is made from a $7 garbage can from Zellers.
The eyes are made from the lids of two tiny micro remote control cars I bought at the dollar store.
The mouth is curtain (sheer) fabric so that I can see. I cut 2 popsicle sticks and glued them inside with a magnet. My cigar has a magnet on the end and can snap onto the magnet in my mouth.
The antenna is a wooden dolls head from Michael's, rolled paper and the lid of a spray paint can.
The arms and legs are sewed onto some cheap used clothes I picked up at Value Village.
I also cut a flap in the front so I could walk up stairs and bend over a bit. I used magnets to pull it back down and hold it in place. They worked really well and made a very nifty clicking sound.


Everything else is just a lot of glue and Polyfilla - and hours and hours of sanding.
I spent about 25 hours on it, and the total cost was about $100 (partially because I messed up once and had to buy more parts) If you check out the link, you'll see I won 1st place at a local Boston Pizza, taking home $200.

Marty


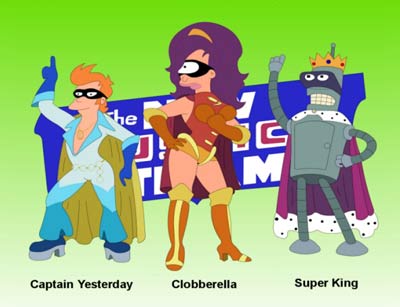
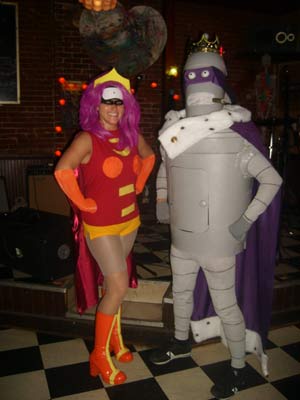
My friend and I were Cloberella and Super King, from Futurama episode "Less than Hero." No pictures of the making of unfortunately, but mine consisted of a lot of spray paint and sewing. Hope you like them!

Sara Johnson


Hi there Rob!

I'm a long time reader of your site, but I've never had a good reason to email you before now.

YAY! I finally do!

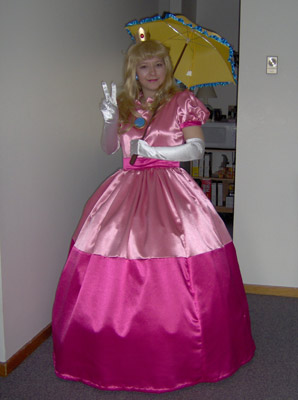
On your site, you're asking, as usual, for pics of readers' homemade Halloween costumes. I've got one! I work at EB Games in a little town in Canada, and this year I got it into my head to go as Princess Peach. I'm very lucky to have a really talented and good-natured mother-in-law who helped me a ton with the dress and wig for this thing. I caused quite a commotion working for 8 hours in this getup at the mall!

Time spent on costume- approx. 2 months

Costume total cost- at least $200. I kinda lost count at some point.

Everything was made from scratch except the wig, which we had to style anyway, and the hoopskirts, which required a few hours' ironing and you can't see anyway.

Hope you like it! Can't wait to see what you built out of all that foam!

Rock on-

Dorothy, aka Peach :)


Hi Rob,

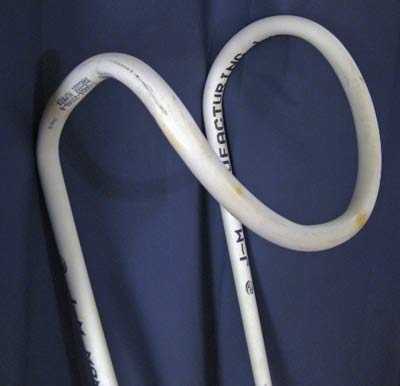
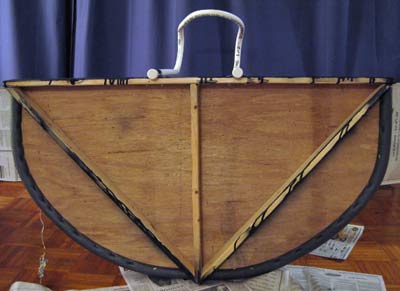
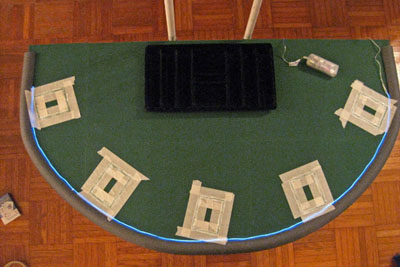
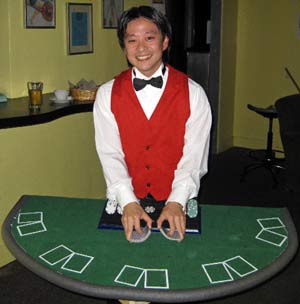
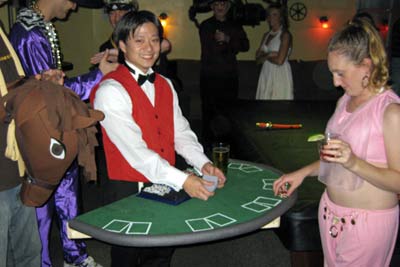
This year, I was inspired by your American Idol judges costume to go as a blackjack dealer. Following your example, the build went pretty smoothly (even the PVC bending, which I was a little concerned about). And it was a big hit -- I won a costume contest, and I'm helping one guy by e-mail who's trying to build his own version (rush job, in a single day).

Here's my blog entry about the building
http://www.joelogon.com/blog/2008/10/building-my-blackjack-dealer-halloween.html

and the wearing
http://www.joelogon.com/blog/2008/10/wearing-my-homemade-blackjack-dealer.html

Thanks for your example and inspiration. -- Joe


Here's my costume this year.
 
I won at the party I went to last weekend!
 
Hope you enjoy
 
Jason Rideout
Oshawa, Ontario, Canada


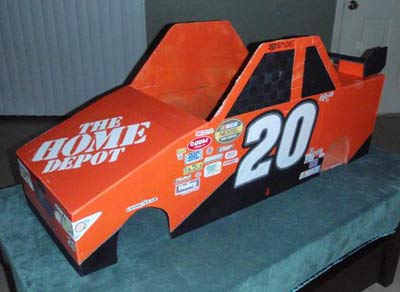
My son wanted a robot costume this year.  It's made out of boxes, garbage, and about 2 1/2 rolls of duct tape.  There are lots more pictures at my site at jaredandaubrey.net, in the photos section.  Noah got tons of compliments as we walked around the neighborhood, and tons of candy, too.

Looking forward to seeing your completed costume.

Jared


Hello Rob!

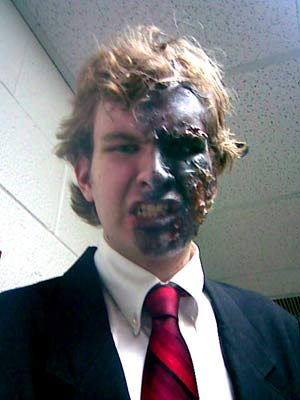
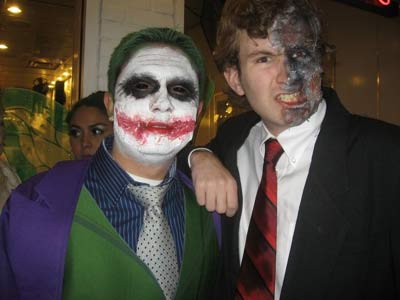
This is my first year in college, and I'm in a big city now (Washington DC). I figured I had to do something comfortable yet different. Since there were going to be plenty of Jokers this year, I went with...

Two-Face!

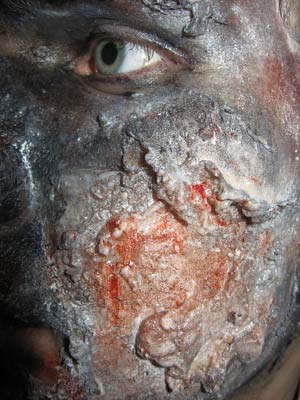
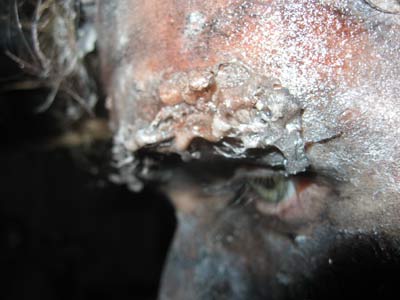
I used an off-the-shelf 3D gel makeup to add all the nasty effects. Unfortunately, my time working with it was short and I couldn't get the boiling water necessary to apply it, so I wasn't able to completely cover my face with it.

It came out really well in some places...but in other spots, the makeup melted down my face while drying. Notice the huge clump around my eyebrow and my comparatively bare forehead.

In any case, the costume was a huge hit. I had a number of run-ins with Jokers and Batmen, as well as random people who felt (for some reason) like kissing my disgusting cheek.

A Joker, Batgirl, and Casual Friday Batman. Another enthusiastic Joker.

Another Batman and Joker duo. Everyone loved this grouping and took a lot of pictures. It's a shame I had to have leftovers with me at the time.

A really spectacular Joker. I think that knife might've been real. Apparently another Two-Face was wandering the streets to, but (according to yet another Joker I ran into) he wore a mask for the other half of his face! Cheater.

Next year I'm going for something bigger. I'm thinking Bob Ross.

Enjoy the pics,
-Phil Salvador


  Please read page 3 of the Cockeyed.com Halloween Costume Contest

page 1 2 3

Other incredible stuff  | Home | Contact RobCostumes Index

November 18, 2008.  

  • Photographic Height/Weight Chart
  • The Weight of Clothing
  • Terms and Conditions  Copyright 2008 Cockeyed.com