
|
|
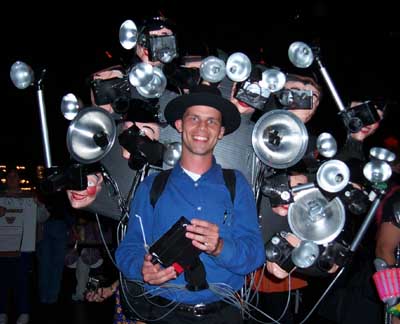
Introduction
|
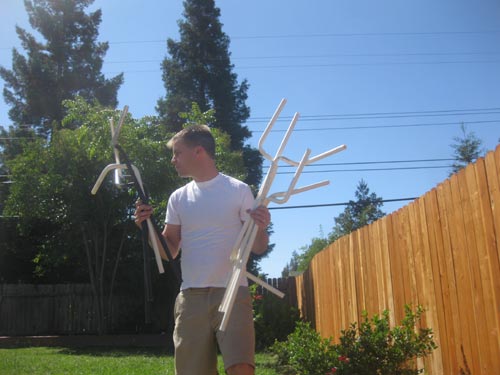
I wanted to build it again, I wanted to wear it again, and I really wanted video of it in action! |
I didn't have a sheet of corrugated PVC sheeting, which was the foundation of the last paparazzi costume. I usually depend on expired election signs, but there were none to be found this early in the season. |
I wasn't sure exactly what I was going to do differently, but I knew I wanted to make it a little more durable, and I wanted to try molding full heads for the photographers, instead of just using masks backed with foam.
On these projects, design goes hand in hand with the materials I am using, and I'm rarely sure of what materials I'm going to use. So I went shopping. This is one of my favorite parts of the costume-making process. How can I create 12 fake cameras for $10? |
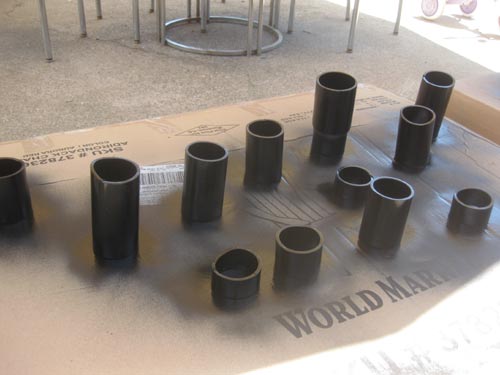
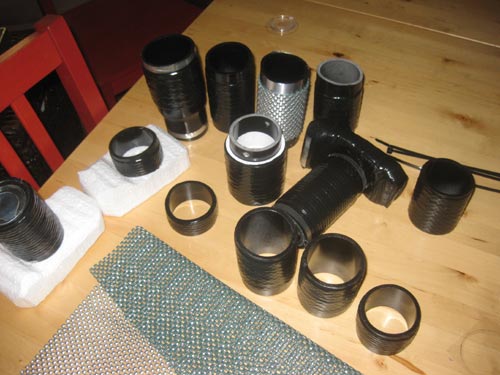
I cut some 2" electrical PVC and painted up some long lenses. |
Readers of Cockeyed.com probably already know that I don't use an SLR camera. I use a little point and shoot Canon. I use the crap out of it. For a better idea of how to put some fake cameras together, I did some research at Best Buy.
|
And Wal-Mart. The trick to shopping at Wal-Mart is to not look too closely at what the other customers are doing. |
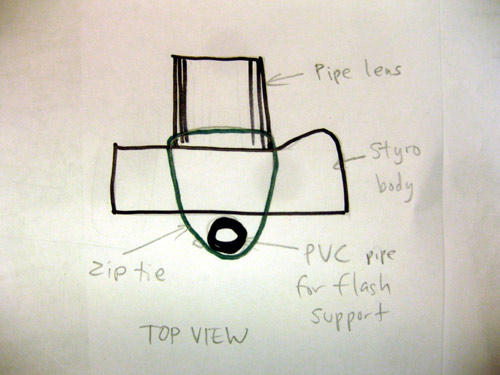
The basic shape of a camera body was a box, with a lump on the side and a little awning on top. |
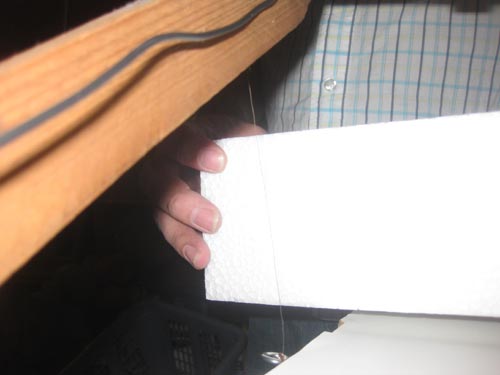
For the camera bodies, I cut a block of styrofoam with a hot wire rig.
|
Once I had the hot wire set up, I went ahead and cut all the bodies. Piece of cake. |
For more information on setting up a hot wire to cut styrofoam, check out the Box of See's Candy costume. |
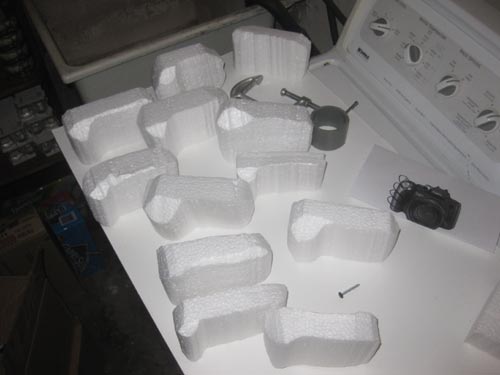
Building 12 cameras, I thought I'd just plow through all the pieces like an assembly line, but I hadn't actually checked my construction ideas, so I ended up making some wrong moves, such as these 24 supports which I ended up not needing.
|
Hot glue did not reliably attach the lenses to the styrofoam bodies, so I prepared a solution using zip ties.
|
Zip Ties |
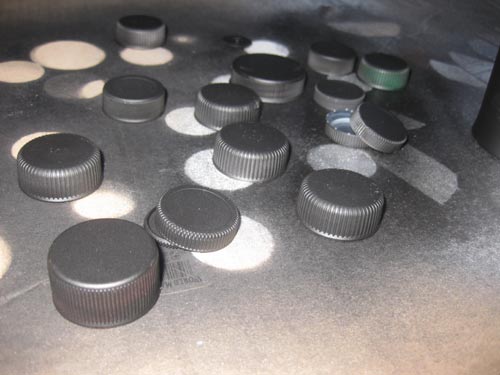
Styrofoam also resists paint, so I planned to wrap the bodies with black electrical tape. This ended up looking kind of crappy. |
At Party Time, I tried to figure out how I would attach faces to the cameras. Plastic masks like this one were my fall-back option. |
|
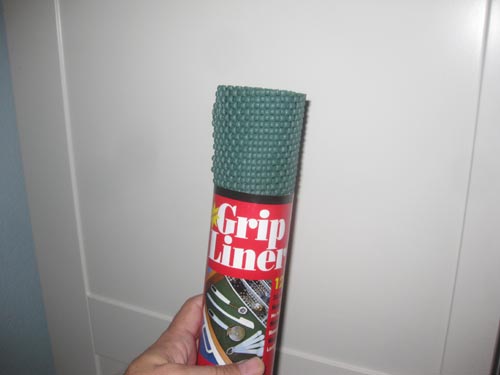
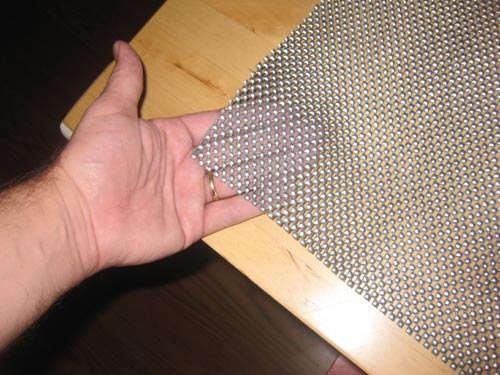
My lens tubes were too thin and too smooth, so I fitted them out with some grip liner from the dollar store. |
Painted black, it looked exactly like the grip from a telephoto lens. Painted silver, it became the lightest softest chainmail you've ever seen. |
|
|
Cutting thin plastic sheet for my lenses. |
The lenses stacking up. I was happy with the variety. I felt like I was missing the stereotypical gigantic white telephoto lens, but I think those are used more for the long-distance secret beach type paparazzi. Let me know if you need a fake photographer at your wedding. |
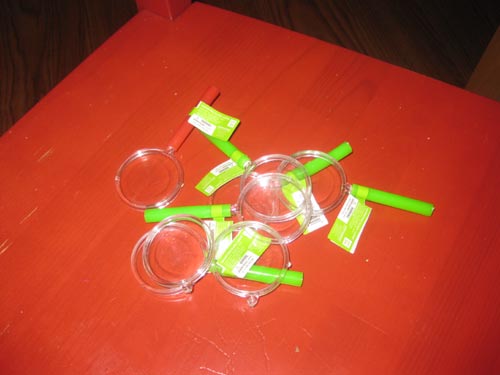
I thought these toy magnifying glasses would add to the look of the cameras, but they were probably a bad idea. |
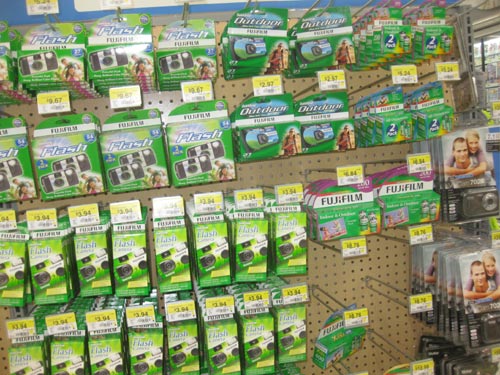
The flash units from disposable cameras are the heart of the paparazzi costume. Back in the early 00s, people used to buy and use the film in these cameras to take photographs. |
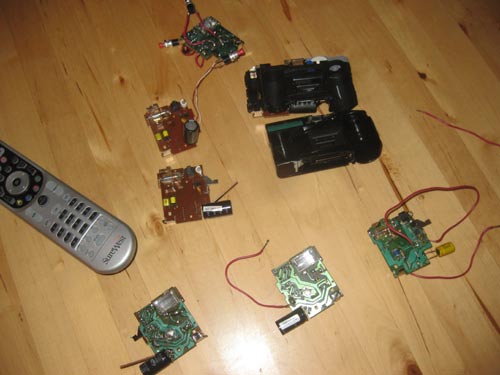
When the film is developed, the empty shells hold all the electronics needed to make an unlimited flash machine. There is a little circuit board, a battery holder, a big capacitor, and a switch. I don't know exactly how it works. |
But I know if you make the right connection you get a shock. |
Or a flash. |
Shells of old disposible cameras are harder to find now that everyone has a camera in their phone, but they are still being sold and used. I had a bunch stored from years ago, so I dug them up and tested them out. |
Flashing around the house. |
|
It might just be an illustion, but these flashes seem much brighter than what I'm used to with my digital. |
At the very least, I should be able to defend myself against Raymond Burr. |
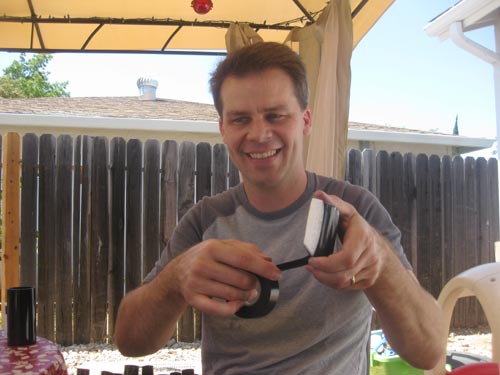
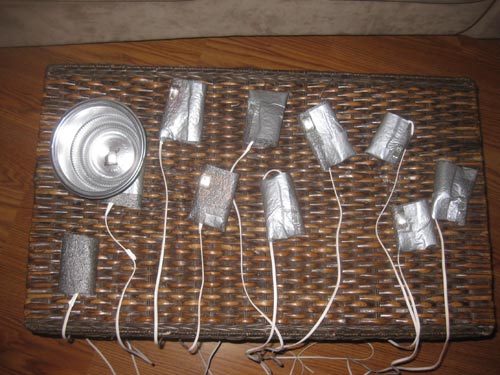
Shopping for bits and pieces for camera details. |
And here's a shot of my time at the electrical tape store. |
Its lectrical tape camera |
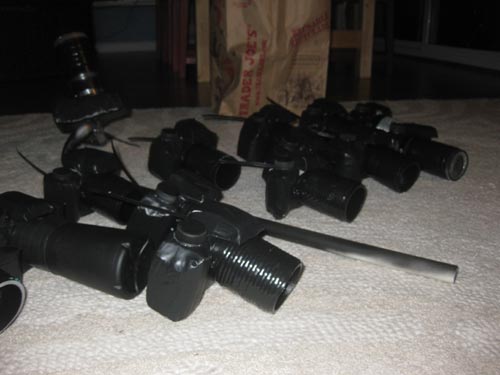
Twelve black electrical tape cameras |
Once |
Once |
|
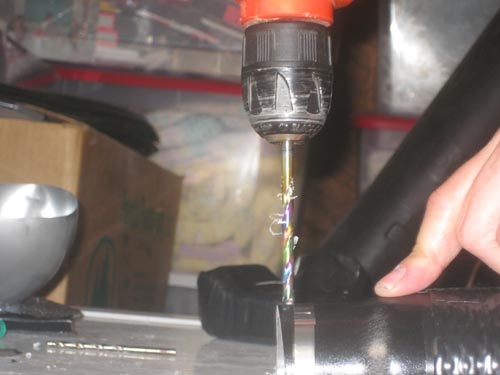
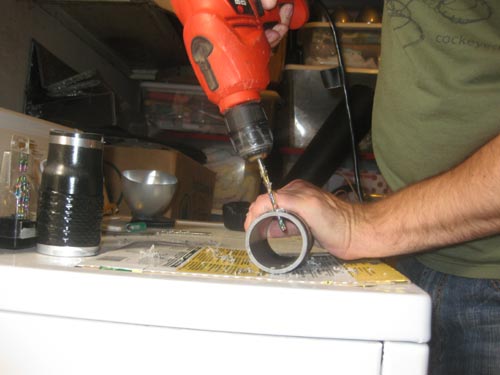
Drilling holes in the side of my lens. |
These are for zip-ties. |
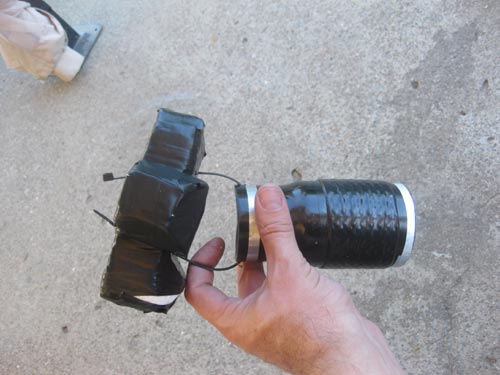
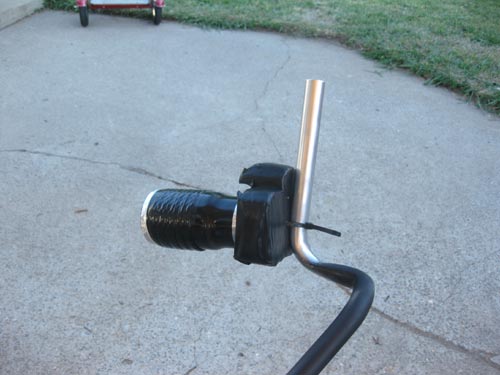
Lens attached to camera body like so... |
...and camera attached to pvc like so. |
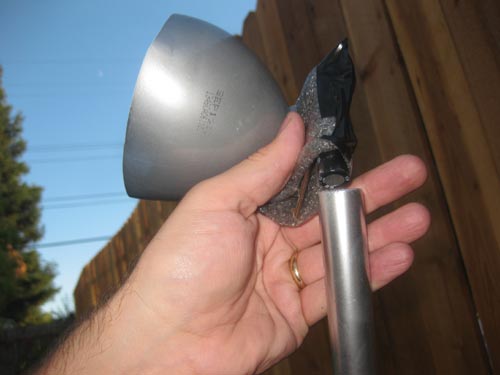
I planned to attach the flash units to the open end of the pvc branches, and the capacitors happened to fit nicely inside of them. |
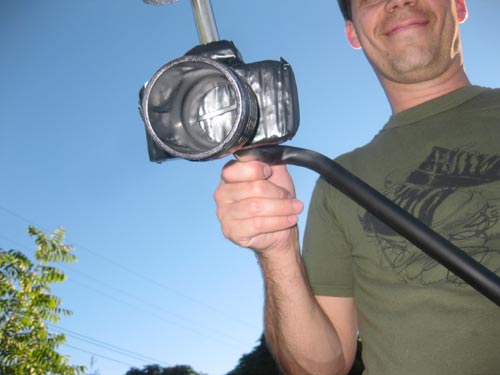
I just needed some photographer heads! |
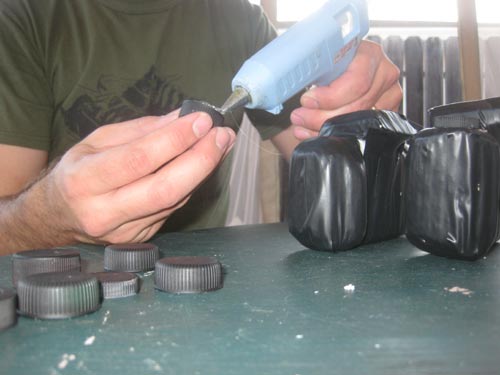
Attaching the shutter speed dials with a glue gun. |
I love when a little extra detail transforms something from "tape-covered shape" into "camera replica". That's what the shutter speed dials did for this bunch. |
|
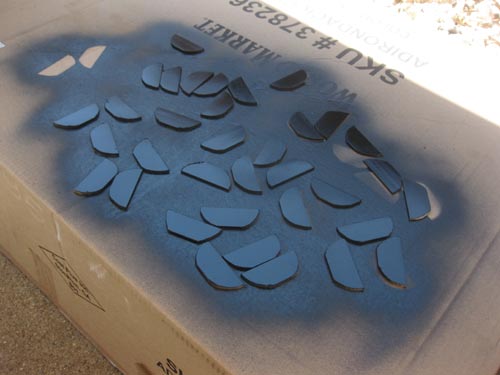
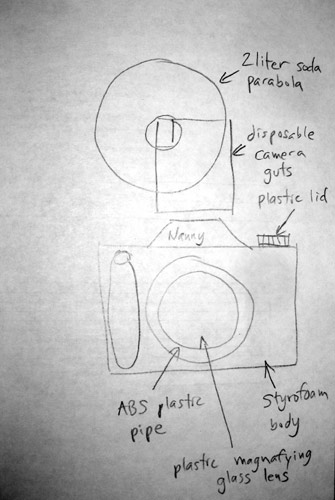
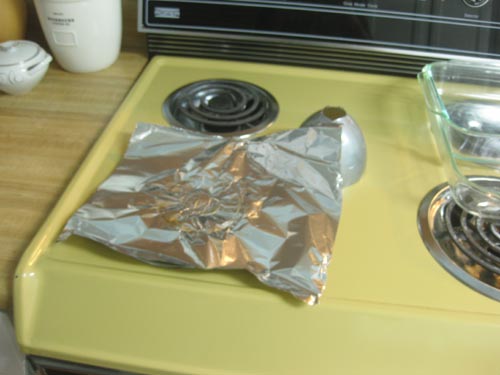
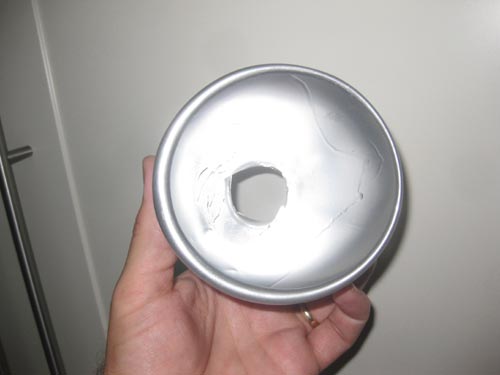
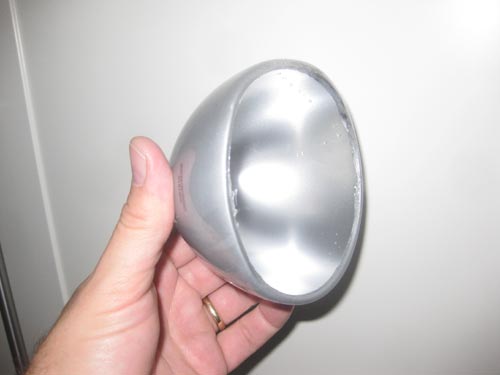
I thought I would just cut the tops off of 2-liter bottles for the flash parabolic reflectors but the were pretty floppy because the plastic is so thin. |
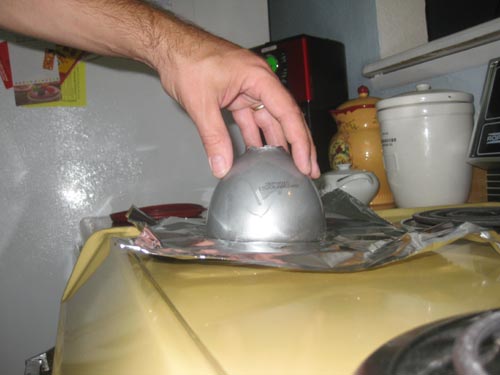
So I thought, I'll melt the cut edge a bit on a hot plate to make a little rim along the edge. I used a sheet of aluminum foil directly on an electric burner and just kept the plastic parabola moving. |
Once |
It totally worked, gave me a perfect little folded-in rim, they are really round and strong. It wasn't a complete accident, but it just turned out way better than I thought. It's amazing how much stronger they are with a little 1/8th inch rim. |
|
My joy lasted for almost a whole day, until I realized I had just re-invented a domed Icee lid. |
|
|
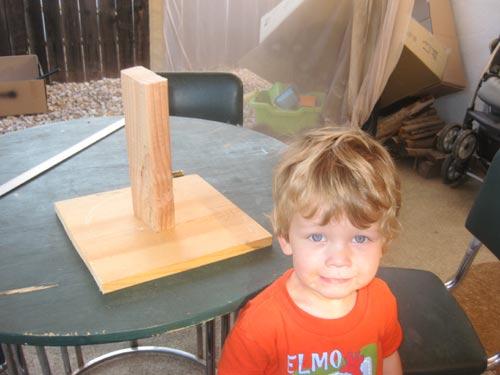
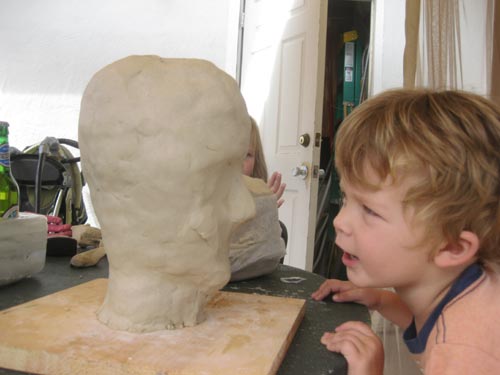
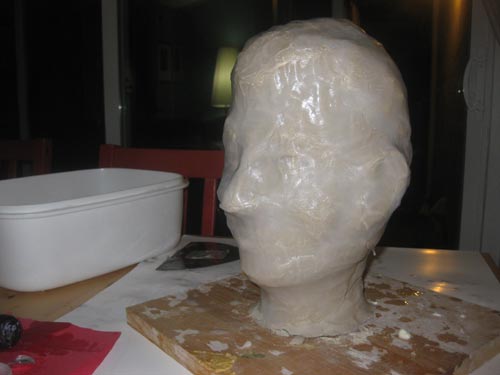
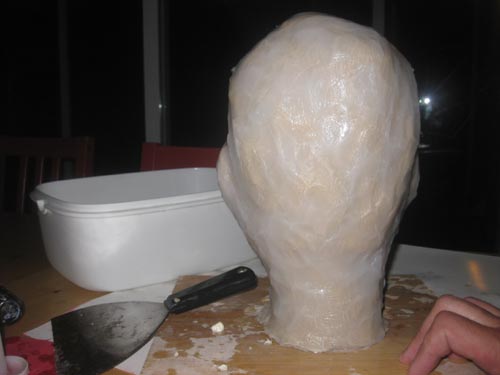
I've made quite a few heads out of paper mache, but this would be my first one out of clay. I started with a 10 1/2" 2"x4" screwed to a 1" pine board. |
Added some lumps of crumpled up paper, attached with plenty of masking tape. |
I bought ten pounds of modeling clay, but I didn't want the entire head to be solid clay, because I thought a huge solid mass of clay would crack as it dried. Also, I wanted to conserve enough of the clay for a second head if time permitted. |
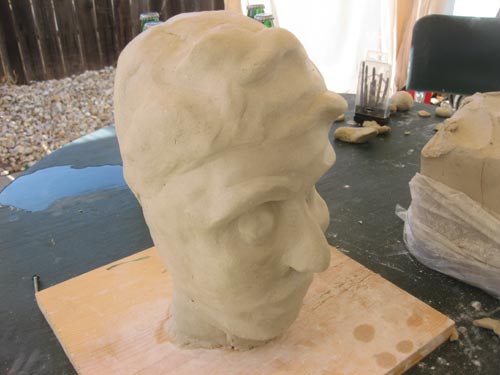
Then I began adding clay and attempting to make a realistic head. |
|
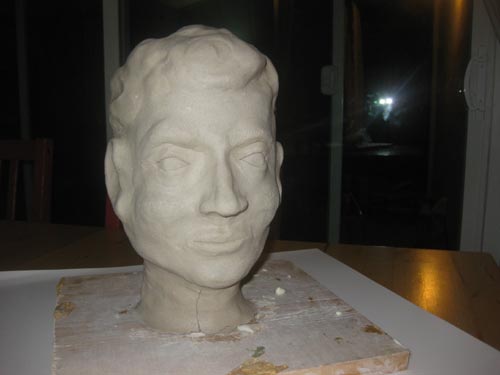
At this point, I knew my head didn't look right, but I wasn't sure what was wrong exactly. I needed a reference, so I looked at pictures of faces in magazines and refined my head. |
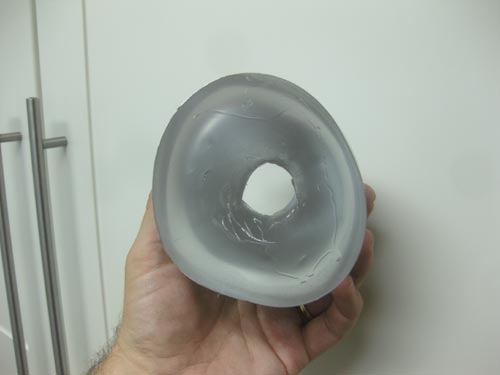
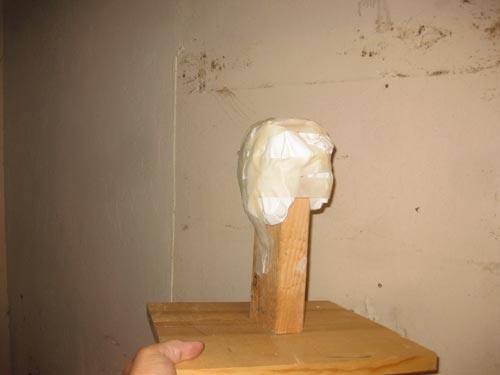
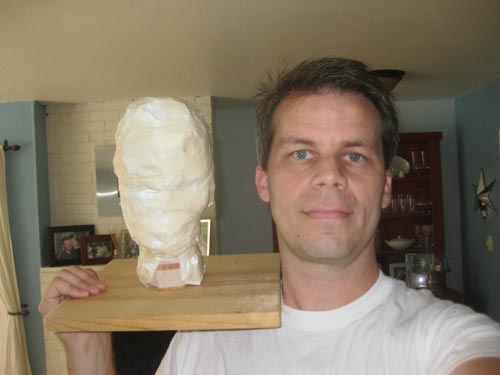
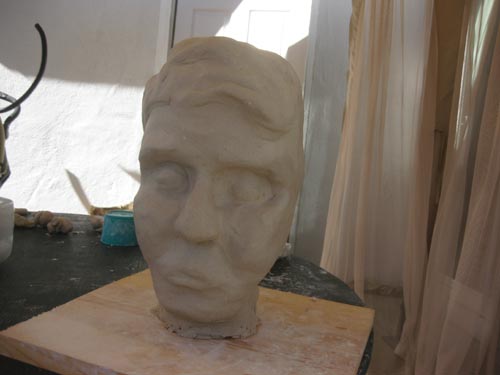
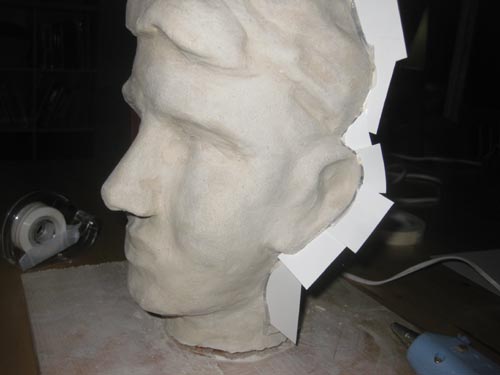
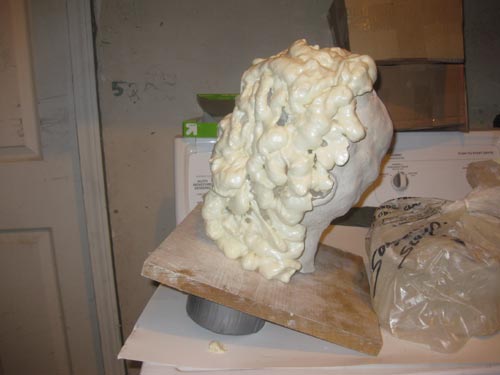
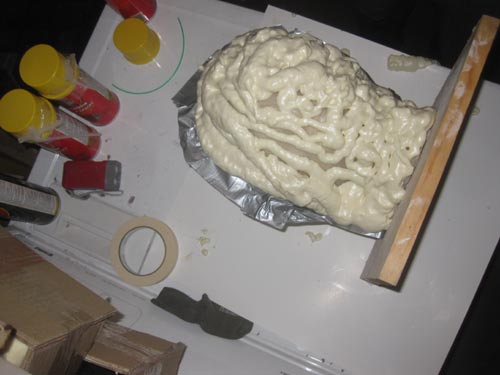
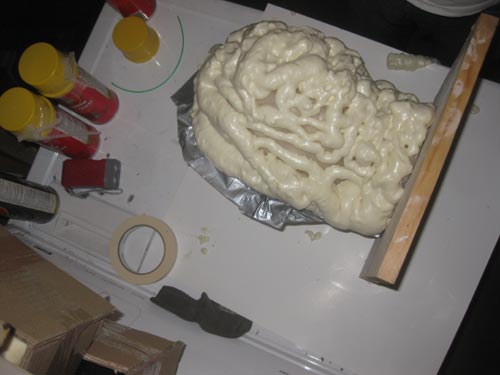
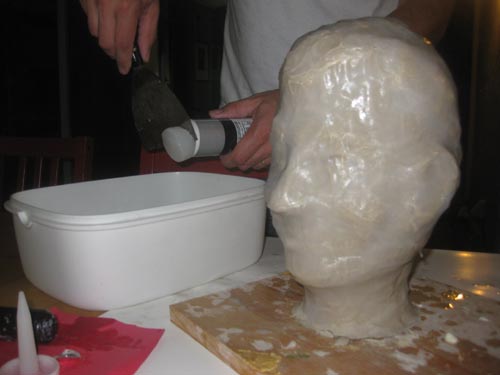
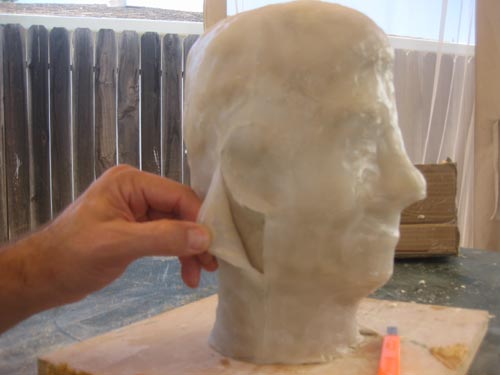
The finished head. Next, I prepared to make a silicone mold around the head. The traditional way to make a silicone mold is to buy 2-part RTV silicone and pour it over the master. I'm sure that method works extremely well, but Scott Holden showed me a cheaper method, and I was excited to try it out. |
Scott showed me last year how he used tubes of regular construction/repair silicone to coat his Tauntaun head with a bead of silicone caulk. When the silicone dried, it formed a whole, flexible skin which had captured all the details of his clay master. Scott's silicone caulk mold-making tutorial: http://www.cockeyed.com/lessons/silicone/silicone.php His method worked really well, using $5 tubes of silicone is much, much cheaper than the traditional materials from Tap Plastics or Freeman Supply (http://freemansupply.com/). However, he had also heard of another method, and I gave it a try. Instead of using a caulking gun to draw a bead of caulk all over the surface of the master, you can press wet silicone pucks directly onto the surface. |
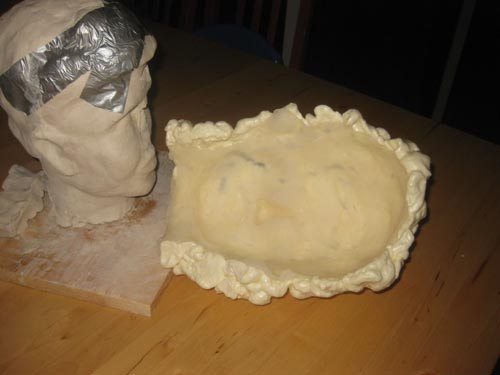
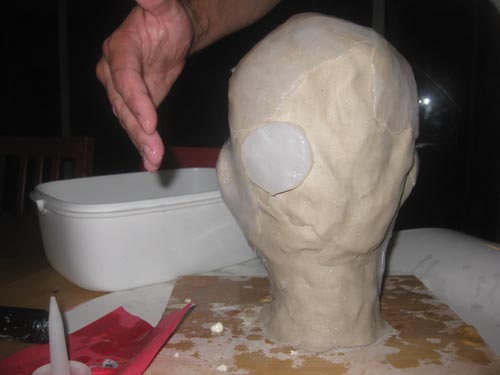
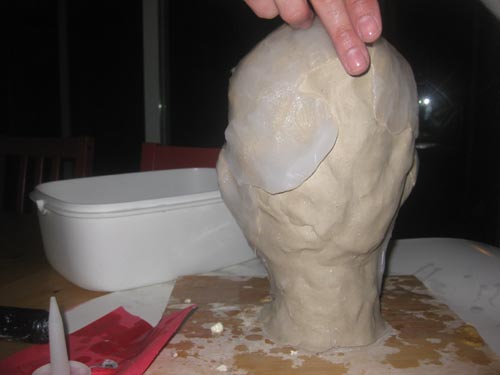
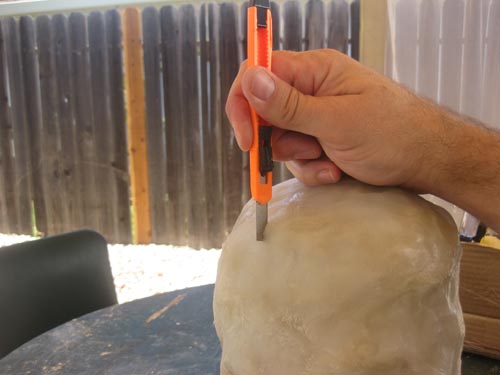
Because my head had details on both sides, I needed to construct a 2-part mold. With thick paper and a hot glue gun, I constructed a thin temporary wall to establish a clean border between the two halves. |
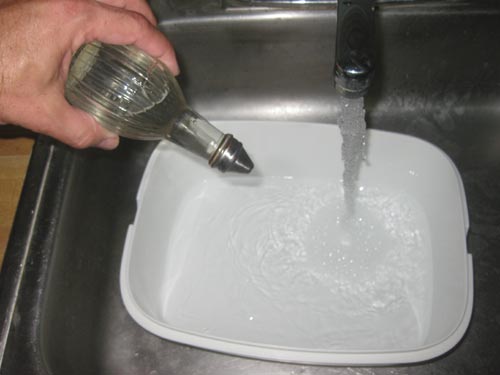
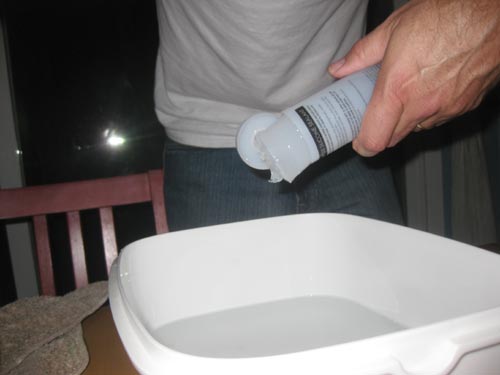
To try the silicone puck mold-making method, prepare a tub of very soapy water. Soapy water will tend to keep the silicone from sticking to your hands.
|
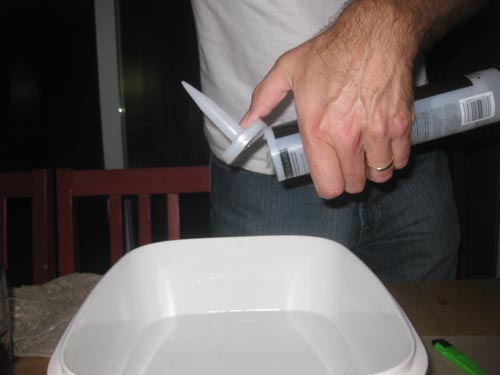
Slice the tip off of the silicone tube and push a little out of the tube. |
I used pucks about the size of an Oreo Cookie. Slice them off into the water with a plastic knife or stir-stick. |
With soapy hands, pick up the silicone puck and place it onto the surface of your master model. Smooth it flat onto the surface with a finger, obtaining 1/4th or 3/16ths of an inch of thickness. Smooth more wet silicone pucks next to the first one, overlapping the edges until the entire surface is covered. |
I let it dry overnight. |
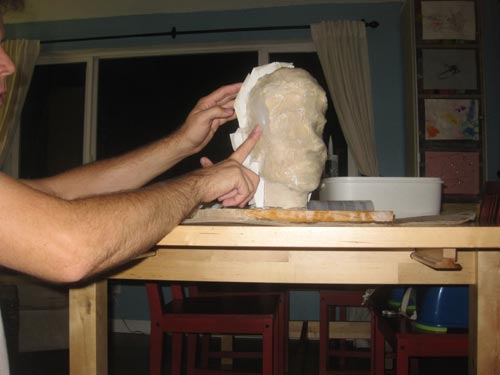
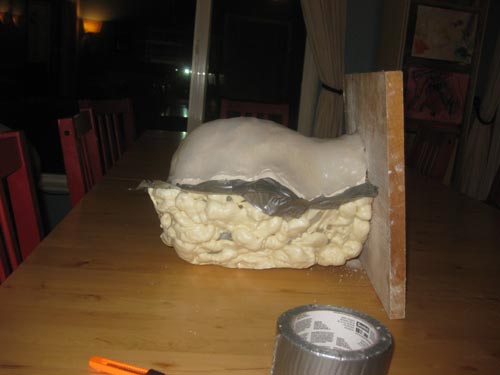
My first attempt to make a mother mold consisted of crafting a cardboard box which fit closely around the clay head. Unfortunately, when I filled the box with expanding foam, I used too much. As the foam expanded, the clay master was lifted out of position. |
After that failure, I realized it would be almost impossible to correctly estimate the precise amount of expanding foam needed to fill the box. My next idea was to flip the head onto its back and spray on a mother mold from the front side, hoping that the resultant shell would be strong enough to support itself. I also tried adding a more substantial separation wall out of clay, but I lost patience with trying to get it to adhere to the head and removed it. |
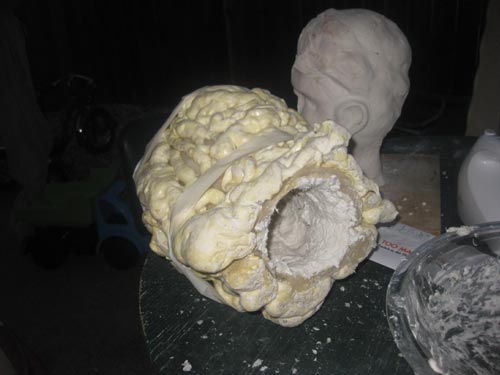
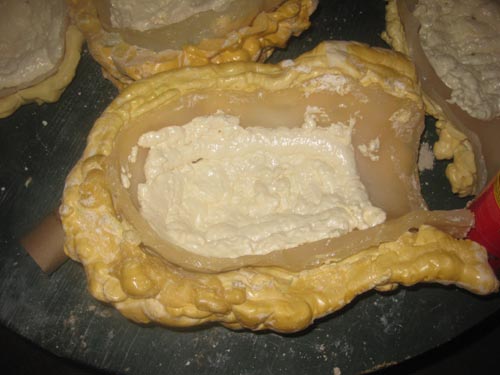
I applied silicone to the back of the head, let it dry and a shell of expanding foam came next. |
|
|
|
|
|
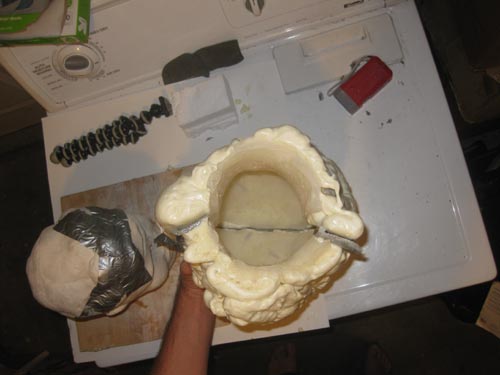
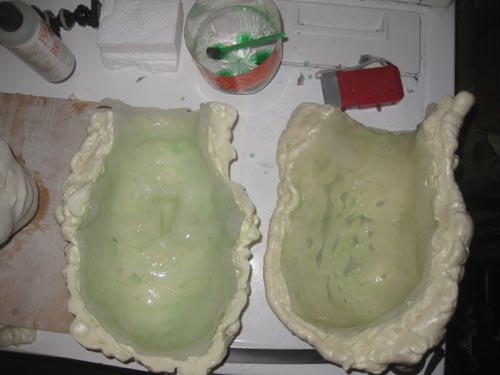
Checking the fit of the two parts. |
Applying some mold release fluid. This turned out to be an unnecessary step when molding expanding foam within a silicone mold. The silicone mold allows all kind of materials to peel out without difficulty. |
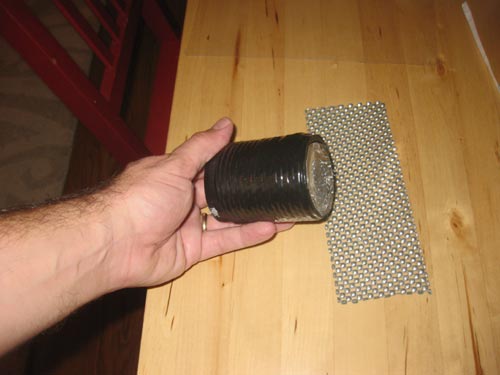
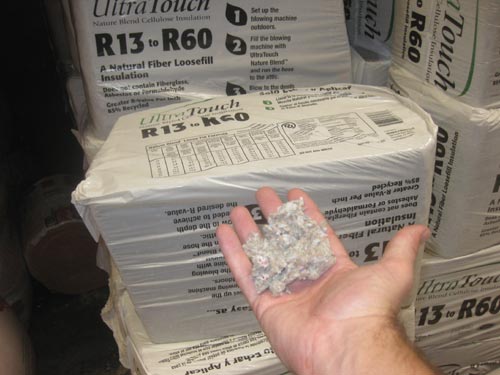
Ready to mold. Next I prepared to make a foam head in my mold. I used cans of cheap "Good Stuff" expanding foam. These are pretty cheap, but once you start using a can of expanding foam, the foam tends to harden in the nozzle, locking the unused portion of the foam inside the can. |
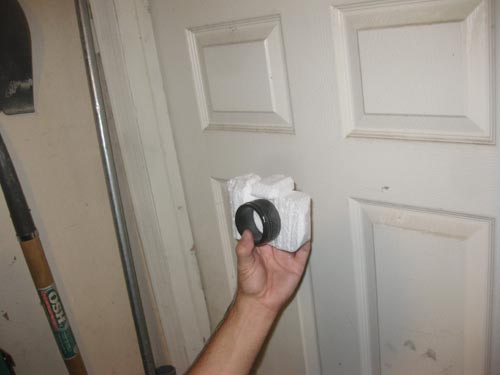
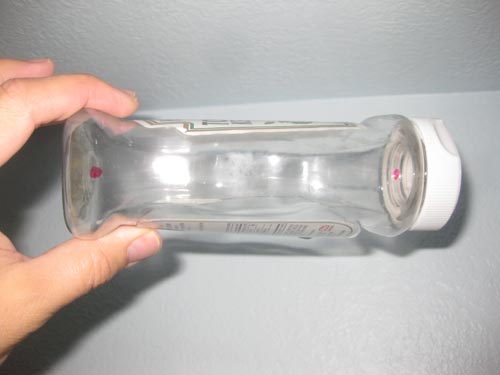
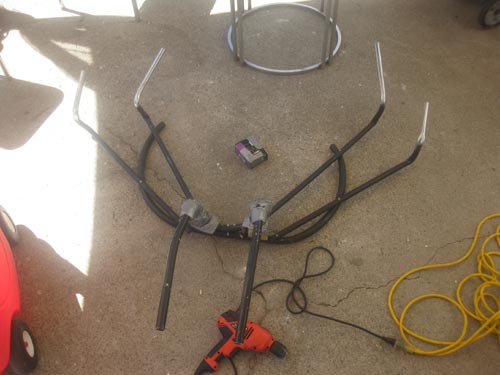
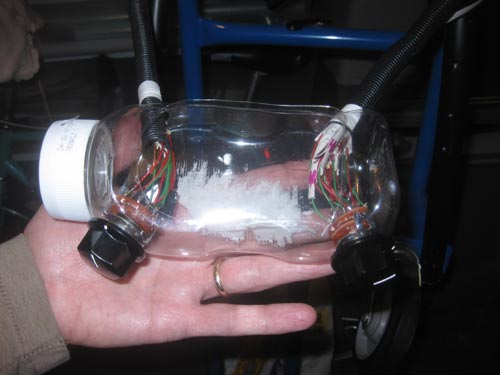
I planned to control the numerous camera flashes with two rotary switches. Rotary switches put 12 switches behind a single knob. With a twist of the knob, I could fire off a bunch of camera flashes, rapid fire. |
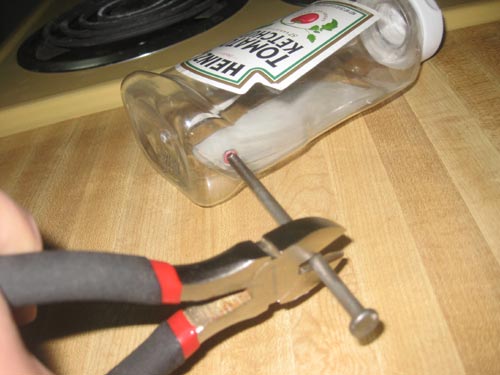
A ketchup bottle would be the switch box. I'd transform it into a camera later. |
Then I heated up a nail on the stove and melted some holes into the plastic. |
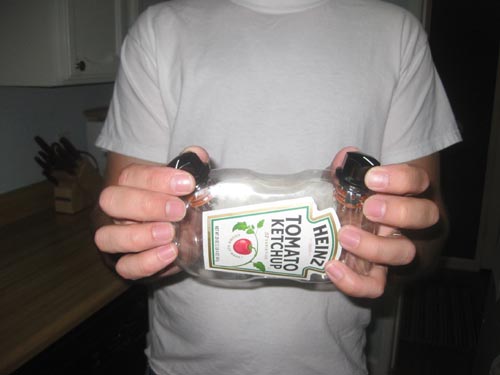
The knobs mounted. Now I control your hamburger. |
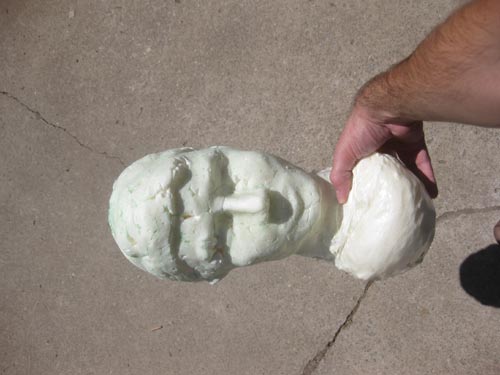
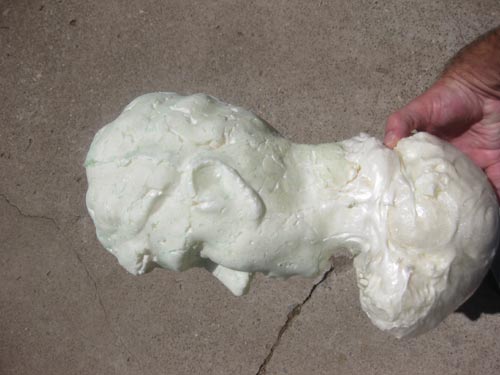
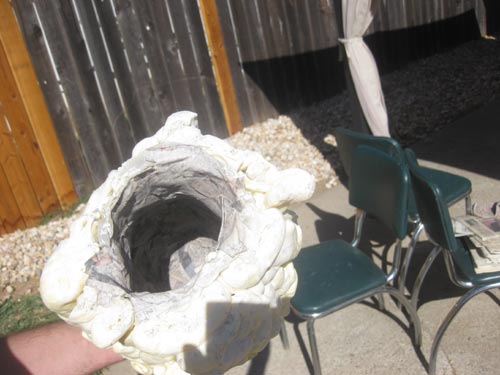
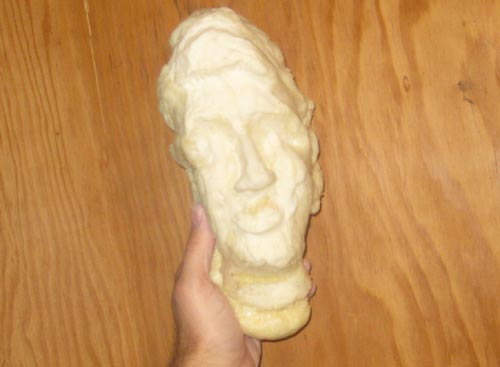
I had been cautious not to overfill the mold, but not cautious enough. Left to dry, the first head overflowed and created a bulbous neck of foam. |
It was very, very lightweight. |
|
It would work. The heads, cameras and flashes would all be firmly attached to the pvc chassis. Now I just had to make 12 of them. After about three heads, I got lazy and failed to completely clean out the expanding foam nozzle. I was left with a mostly-full can of expanding foam with no way to get it out. |
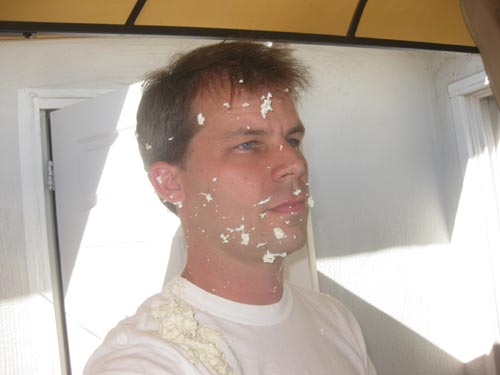
I tried prying it open. It erupted with expanding foam, getting all over my face, hair shirt and hands. Also, the gazebo netting, the table and four chairs. This was a disaster. |
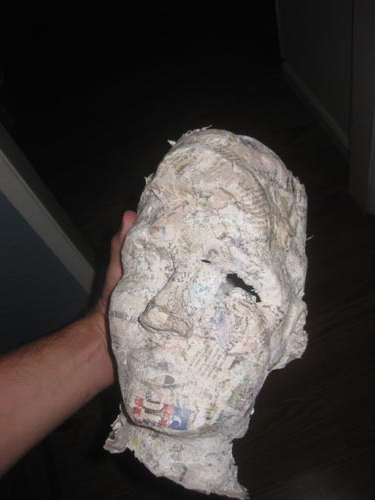
With a few more heads completed, I started to notice that the styrofoam heads might not be the best material. They were shrinking! |
Instead of jumping into shredded newspaper, I tried one with traditional paper strips, stuffing them into the mold. I have seen a documentary showing men lining the interior of a similar mold to make a clothing designer's dress form, so I figured it would work ok, even though I couldn't see exactly where the paper is going. |
It worked, but it was difficult to get air circulated into the enclosure, so drying took almost two full days. |
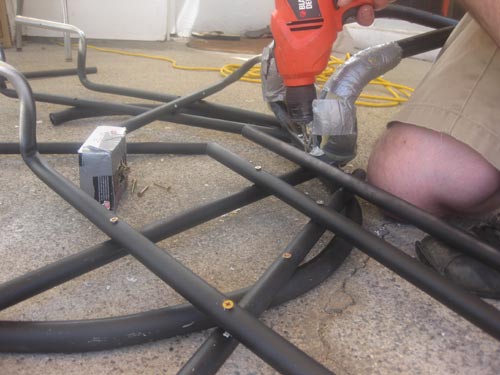
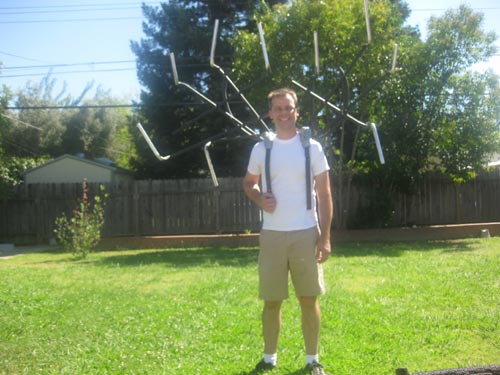
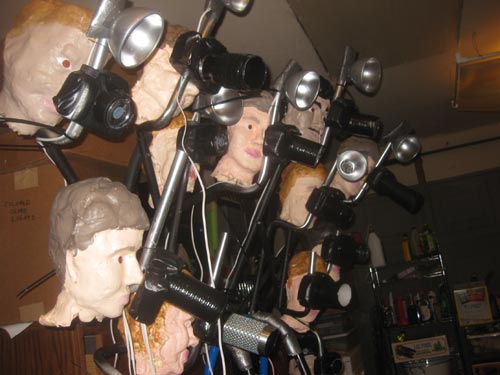
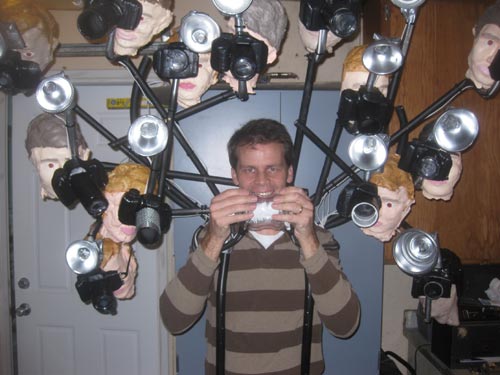
While the newspaper head was drying, I concentrated on building the harness which would hold all the heads. I bent more PVC pipes. Notice my hair is shorter in this photo? That's because I had to cut the foam out of it. |
I wanted the heads to be arranged in a jumbled arch around my face. |
I wanted the heads appear as if in a crowd, so the construction ended up a little haphazard. |
It looked a little like a rack of antlers. |
And here is my completed menorah costume. |
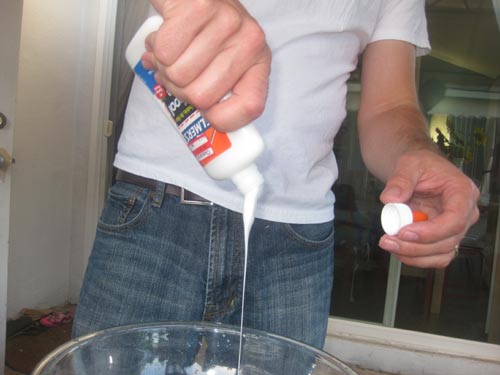
I found a recipe for cheap paper mache clay on ultimate paper mache.com. It required toilet paper, white glue, flour, joint compound and linseed oil.
I couldn't find linseed oil available in a container smaller than a gallon, so I just left that out. |
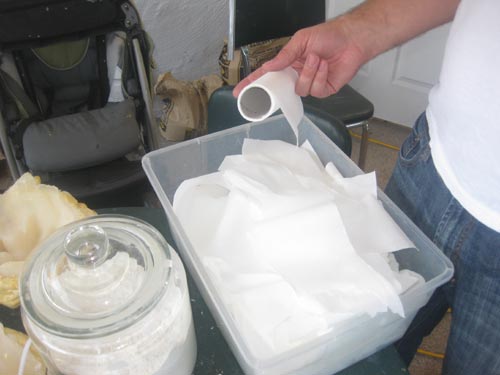
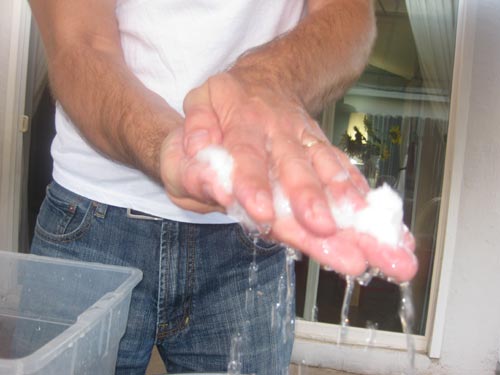
I shredded the toilet paper and soaked it. |
Then I squeezed out the water.. |
...and tore it into shreds. |
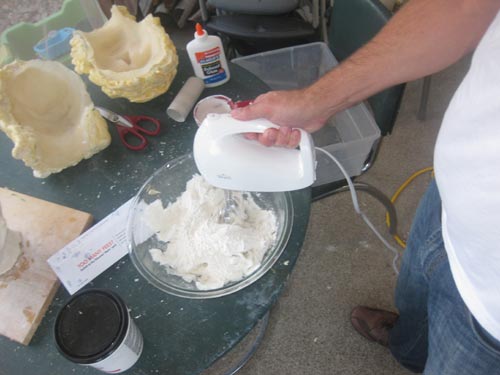
I added the rest of the ingredents and blended it all together. |
|
This would probably be better with chocolate chips. |
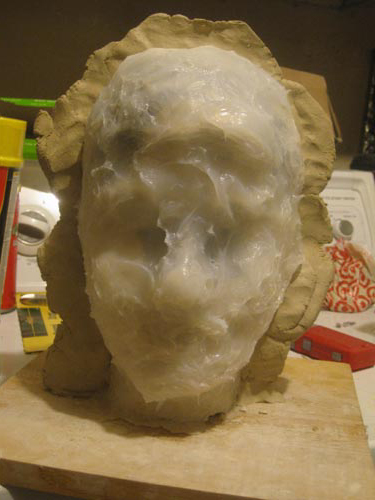
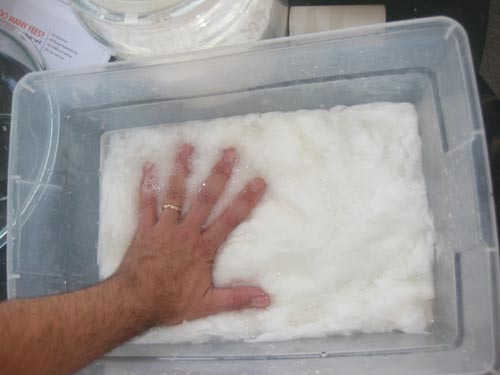
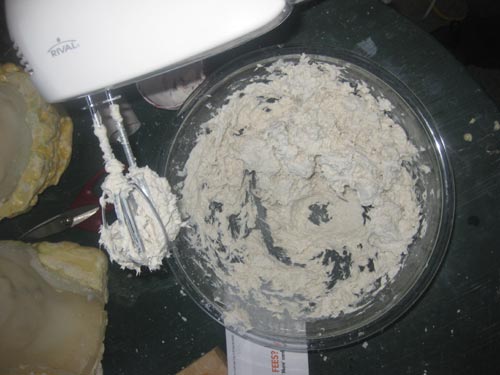
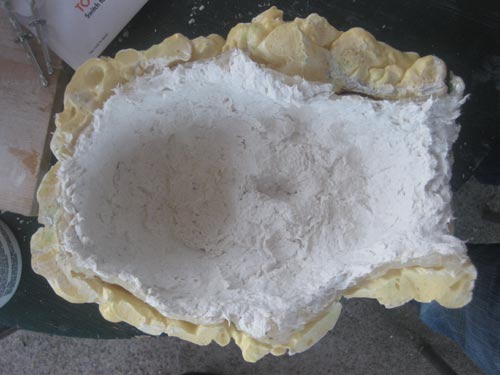
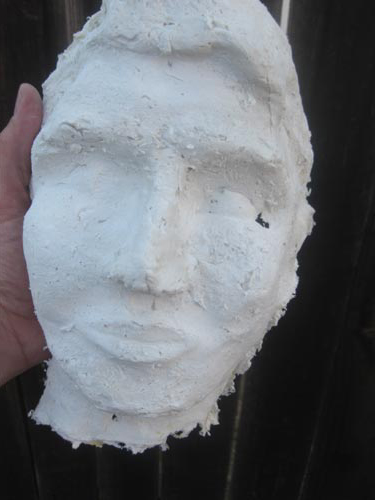
The paper mache clay had a really nice consistancy. Solid, smooth and very white. It pressed into my mold easily. |
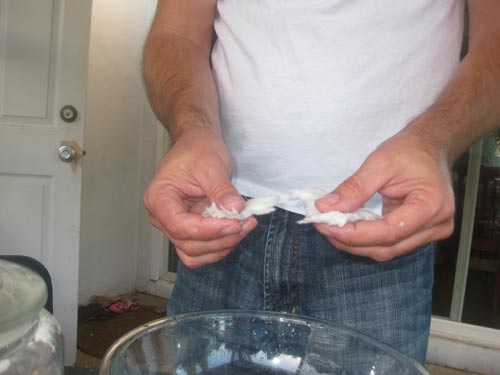
The hardest part was matching the two halves together and pressing enough paper clay into the seam.
|
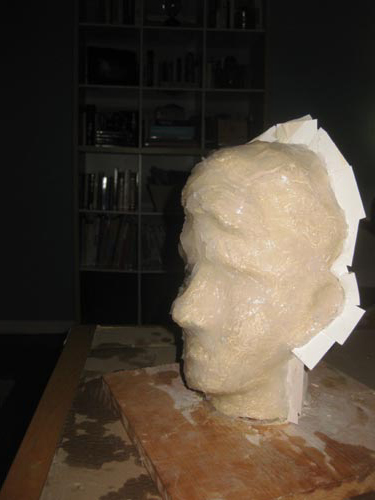
Here's a shot of one of the shrinking foam heads. This isn't a stretched image. Over the course of 10 days, four of my first heads shrunk like this, like a shrivelled apple core. Luckily, a couple of the heads had held their shape. The heads which had been formed from the densest foam had been able to keep their shape. |
The paper mache clay mold worked. The head had a nice shape, and the ingredients were cheap, but it took almost three days to dry in the mold. Too long. It had a nice weight to it and seemed very sturdy. I'd remember this recipe for other purposes, but it wasn't right for this project. |
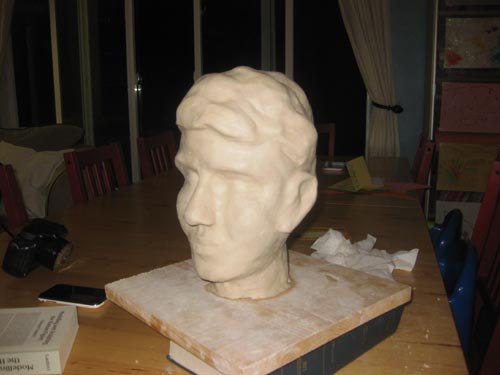
Not satisfied with the speed of head production, I sculpted a second head out of clay. |
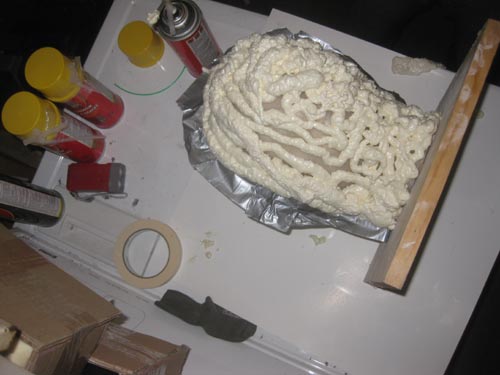
I followed the same method to cover this one in silicone. I covered it in a single piece this time. |
Cutting a puck of silicone |
Placing the silicone puck. |
Smoothing the silicone puck. |
Complete. |
when the silicone was dry (the next day) I cut my seperation line. |
|
This worked pretty well, and I soon had two head molds in working order. |
To help keep the heads from shrinking, I filled them in layers, allowing the bottom layer to harden before adding more foam. |
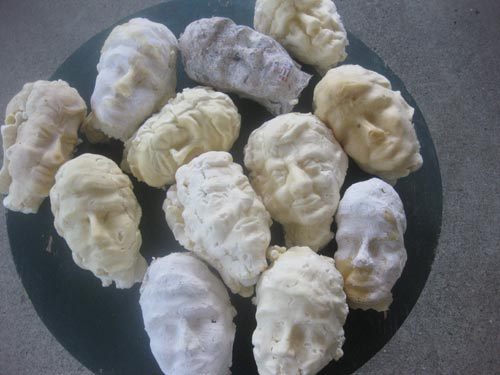
With two molds in service, I was able to churn out 12 heads pretty quickly. I also used the paper mache heads. |
I patched them up a bit and started painting. |
Mixing face colors. |
I wanted a variety of face colors, but I wanted to keep the heads cartoonish. This was mostly to save time. |
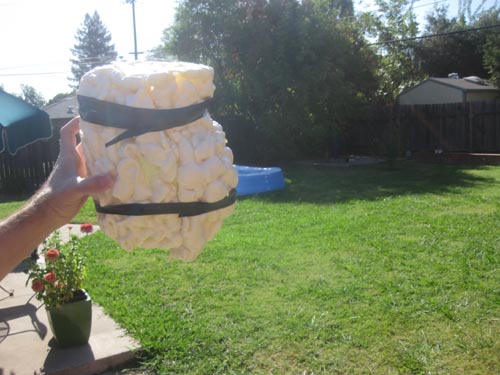
A box of paparazzi heads, similar to the one in Russell Crowe's storage unit.
|
For eyes, I couldn't find doll eyes of the correct size, so I tried making some. I painted the surface of a plastic soda bottle. |
The plastic helped keeped the eyes looking shiny. |
Next I added lips, pupils and an occasional mustache. |
They looked crude, but I think these homemade jobs were better than a rack of identical styrofoam heads from a hat display. With a long lens. I think this one was from an Ethos water bottle. |
The blonde. |
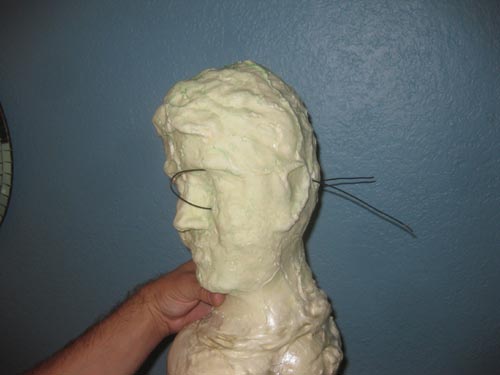
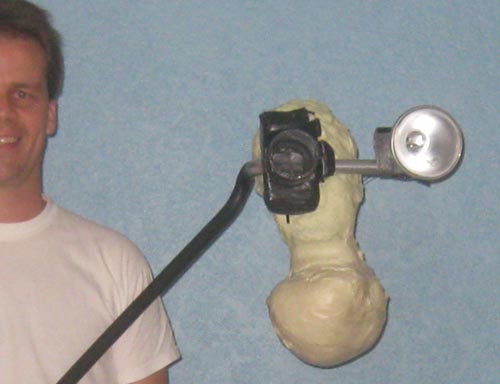
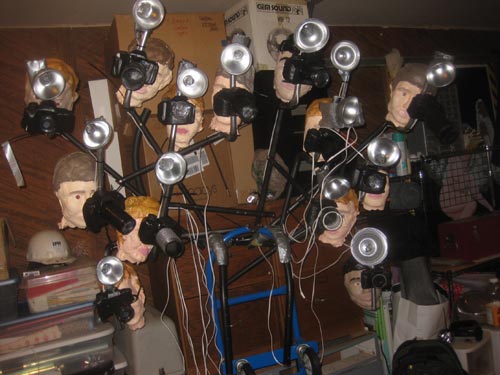
I was worried about mounting them with a wire through the head in full view, but it was fairly well camoflagued in practice. |
Three guys, straight out of the Uncanny Valley Photograpy Club. |
The heads went on in less than an hour, and it was time to get the flashes going. |
I used 4-strand telephone wire. Actually just the red and green, to extend the connection which activated the flash. Hazard: The high-voltage capacitor on these boards can shock you. It is painful and it might be very dangerous. |
I had twelve cameras to make, so I tried to set up a little assembly line. |
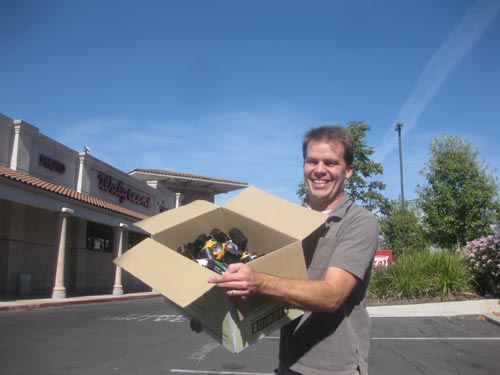
I didn't have quite enough disposible camera shells to complete the job, so I stalked a few photo labs in town, begging for shells. On my 9th try, I hit gold. I got a big box of cameras from this Walgreens on Sunrise and Greenback in Sacramento. |
After extending the switch with a six-foot wire, I wrapped the circuit boards in foam sheet. This would hopefully reduce the number of shock victims at the parties I visited. |
And finally, I hot-glued the plastic parabola onto the flashes. |
|
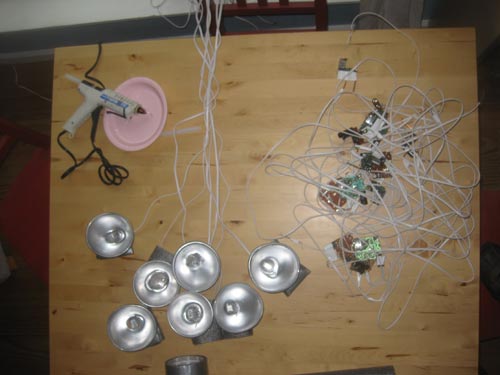
Flashes. |
I mounted the flashes with duct tape and started troubleshooting them. One problem was that I had shorted the flash charge activation switch on many cameras. I thought this would make charging simpler, but it drained the batteries. I re-soldered those with activation switches. Running the wires through the PVC pipes was too much trouble. The curves were too sharp, and many had screws through them. It was a lot simpler to zip-tie the cords to the side of the pipes. |
Flashes onboard. All the flash switch wires were routed to my shoulders, where the would soon meet up with the rotary switches. |
|
Flash Test! |
Encased in some wire loom, the cables were bundled and ran into my ketchup bottle switch box. |
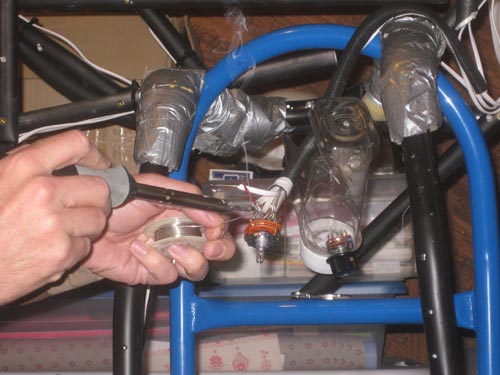
Here I met a new problem. I hadn't kept the color coding consistant. Some of the cameras used a red wire for the charged half of the switch, some used a green wire. I needed all the ground wires to meet in the center of the rotary switch, but I couldn't tell which was which. I panicked for a moment, dreading having to rip open all of my foam flash bundles, before I realized I could sort it all out with a multimeter.
|
By the time I got to the second switch, I was having trouble focusing, but this was the part I was most afraid of failing at. The heart of the difficulty. When it came together, and actually worked, I was ecstatic. |
I've got three contests lined up this weekend: Friday night is "One Scary Nite" at the California Auto Museum, hosted by Flavor Flav. Saturday night is the "Exotic Zone Ball" in Sacramento, hosted by Sasha Grey and Sunday night is "Howl at the Moon" at Thunder Valley Casino. |
|
Wish me luck! |
Please continue reading Part 5 of the Paparazzi Costume 2
part 1 | 2 | 3 | 4 | 5 | 6 | 7 | 8 | 9 | 10 | 11 | 12 | 13 | 14
Spinning Tornado Costume |
Scott's AT-ST Costume |
Balloon Hut |
Feather Pinwheel |
QR Code Costume |
Paparazzi Costume #2 |
Solid Ice Beer Caddy |
Greg's Whiplash Costume |
Lloyd Dobler Boombox Costume |
Best Costumes on the Internet |
The Money you Could be Saving with Geico Costume |
Urban Gardening |
Kindling - wooden Kindle |
Box of See's Candy Costume |
Dwight Shrute Bobblehead Costume |
The Light Sharpener - satellite dish solar cooker |
The American Idol Judges Halloween Costume |
Sudoku Costume |
The Infinite Candelabra |
Baby June, hospital childbirth |
Hero's Engine |
Devo Hats |
Fandango Costume
Dr. Octopus Costume |
Jenga Costume |
Banana Skin Coat |
Fisherman |
Hypnodisk |
California costume |
paper mache satan |
spring shoes |
metallic wings |
fire without matches |
paper mache hummingbird |
paparazzi costume |
matchstick cats |
fish costume |
ketchup packet bear |
Africa costume |
push to cross sign |
paper mache globe |
paper mache alien |
pet coffin |
paper mache Elvis
How much is Inside? |
Pranks! |
Citizen |
Photographic Height Weight Chart |
Science Club |
Incredible Stuff |
Travel |
About
Home | Contact Rob October 29, 2010.